Modify Page Layout In MS Word
How to Change Page Orientation in MS Word
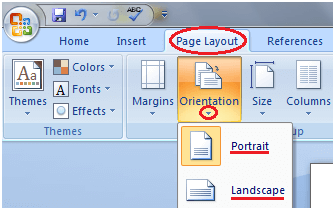
Page Orientation refers to the direction in which a document is displayed. It is of two types; portrait (vertical) and landscape (horizontal). The default orientation is portrait; it can be changed to landscape by following these steps;
- Select the Page Layout tab
- Locate the Page Setup group
- In Page Setup group click the Orientation command
- It displays two options, Portrait and Landscape
- Select the desired page orientation
See this images:
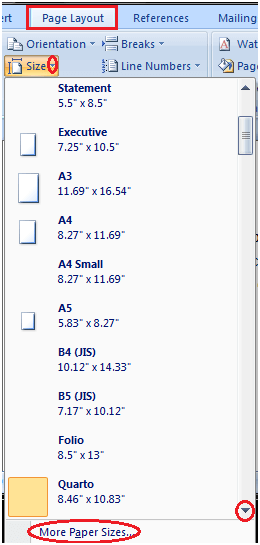
How to Change Page Size in MS WordThe default paper size in Word is 8.5 x 11 inches which easily fits in printers. This size is not fixed; you can change it if you want a document with different paper size. The steps to change the paper size are given below;
 How to Change Page Margins in MS WordThe margin is the space between the text and border of a document. By default, it is a one-inch space. Depending on your needs, it can be changed by following the below-listed steps;
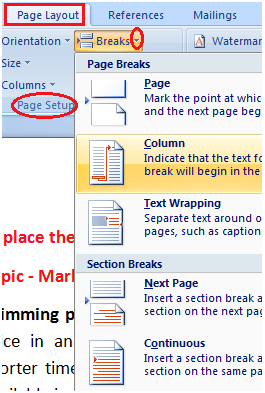
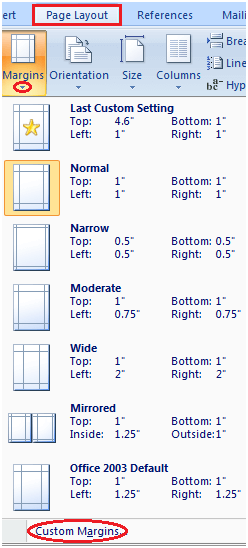 To customize Margins select 'Custom Margins'. It displays a 'Page Setup' dialog box. Enter the desired margin size and click Ok. To customize Margins select 'Custom Margins'. It displays a 'Page Setup' dialog box. Enter the desired margin size and click Ok.See the image: 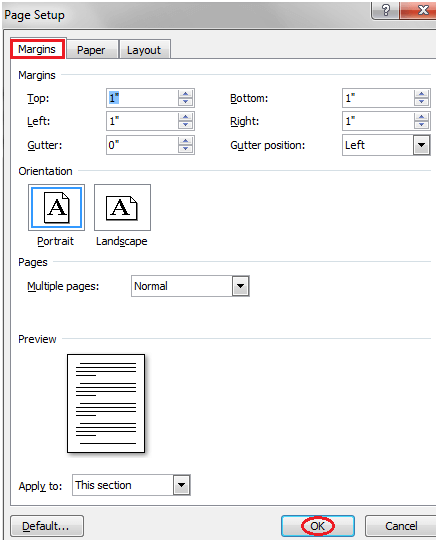 How to Insert Page Break in MS WordWord inserts a page break at the end of each page. It also allows you to insert a page break at some other place in the document. The steps to insert page break are given below;
 How to Insert Header and Footer in MS WordHeader and Footer allow you to add additional information like dates, file names, page numbers at the top or bottom of your document. The basic steps to set up a header and footer are given below;
 If you select the Blank option it displays Design tab with header and footer tools. If you select the Blank option it displays Design tab with header and footer tools.See the image: 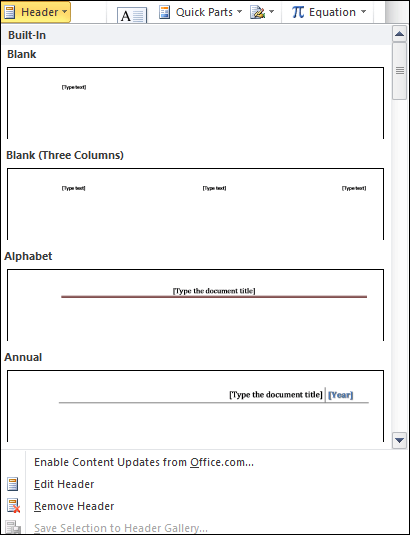 Once the Design tab is active you can add Date and Time to Header or Footer by clicking the Date & Time command. On clicking it displays 'Date & Time' dialog box. Select the desired date format, time format or date & time format. Once the Design tab is active you can add Date and Time to Header or Footer by clicking the Date & Time command. On clicking it displays 'Date & Time' dialog box. Select the desired date format, time format or date & time format. |


Comments
Post a Comment