Adding and Updating a Table of Contents In MS Office
Adding a Table of Contents
Table of contents entries are automatically marked when Heading Levels are applied within a document. Text which has the Heading 1 style applied to it automatically becomes a top level entry within the table of contents. Text which has the Heading 2 style applied to it automatically becomes a second level entry.
You can add a table of contents even if you haven't applied heading levels in your document, but it's a little more work. You would have to manually enter the headings and page numbers, and the Update Table function, described below, is not available. Your instructor will explain this in more detail later in this lesson.
To add a table of contents to a Microsoft Word document:
- Place your cursor in your document where you would like the table of contents to appear.
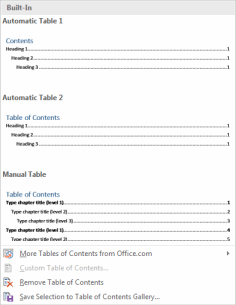
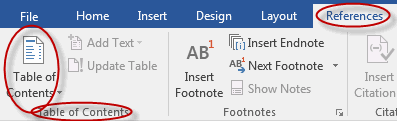
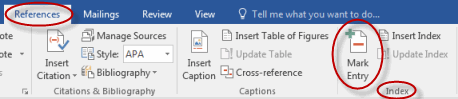
- Click on the References tab and from the Table of Contents group, click Table of Contents:

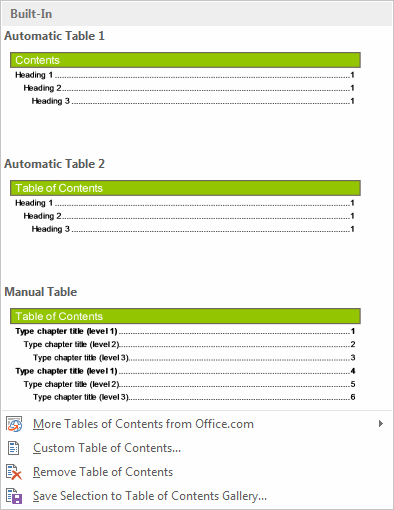
- Select one of the options from the drop-down menu by clicking on it:
Updating the Table of Contents
The table of contents does not automatically update as you make changes in your document. Fortunately, updating it is simple.
To update a table of contents in a Microsoft Word document:
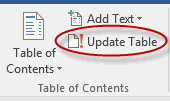
- Click on the References tab and from the Table of Contents group, click Update Table:
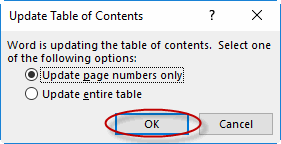
- In the dialog box that appears, choose to update page numbers only or update the entire table and then click OK:
Deleting the Table of Contents
To delete a table of contents from a Microsoft Word document:
- Click on the References tab and from the Table of Contents group, click Table of Contents:

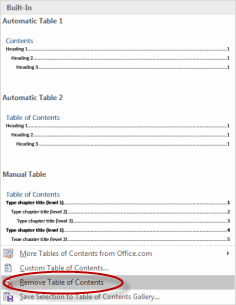
- Select Remove Table of Contents from the drop-down menu by clicking on it:
Insert and Update a Table of Contents
Duration: 5 to 15 minutes.
In this exercise, you will insert a table of contents into a document, make a change to the document and then update the table of contents.
- Navigate to the Word2019.3/Exercises folder and open Plants in my yard2.docx.
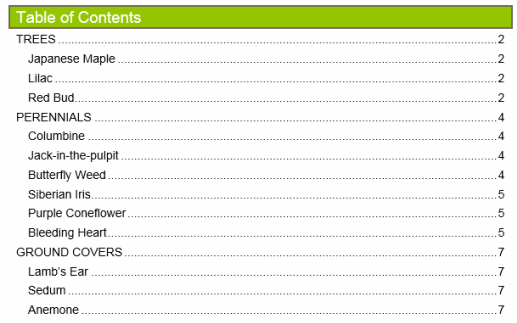
- Add a table of contents that looks like the image below on the page following the cover page:
- Insert a Page Break between the table of contents and the first heading (Trees).
- On the Insert tab, in the Pages group, click the Page Break command:
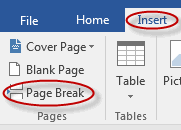
- On the Insert tab, in the Pages group, click the Page Break command:
- Update the table of contents to reflect the updated page numbers.
Solution:
- Place your cursor at the top of page 2 (above the heading "Trees").
- Click on the References tab and from the Table of Contents group, click Table of Contents:
- Select the second option (Automatic Table 2) from the drop-down menu by clicking on it:
- On the Insert tab, in the Pages group, click the Page Break command:
- Click on the References tab and from the Table of Contents group, click Update Table:

- In the dialog box that appears, click OK:

- Save the document as we will continue to build on this document in future exercises.
Footnotes and Endnotes
Inserting Footnotes
To insert footnotes into a Microsoft Word document:
- Place your cursor in your document where you would like the symbol representing the footnote to appear.
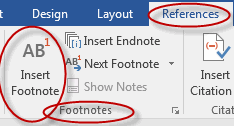
- Click on the References tab and from the Footnotes group, click Insert Footnote:

- Enter the footnote itself.
Inserting Endnotes
To insert endnotes into a Microsoft Word document:
- Place your cursor in your document where you would like the symbol representing the endnote to appear.
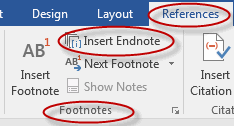
- Click on the References tab and from the Footnotes group, click Insert Endnote:
- Enter the endnote itself.
Locating Footnotes and Endnotes
To move between footnotes and endnotes in a Microsoft Word document:
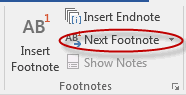
- Click on the References tab and from the Footnotes group, click Next Footnote to move to the next footnote in the document:

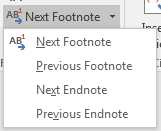
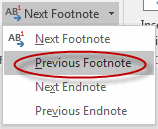
- To move to a previous footnote or to an endnote, click on the drop-down arrow and select the option of your choice:
You can also move between and search footnotes and endnotes using the Navigation pane (in Word 2010 or 2013): 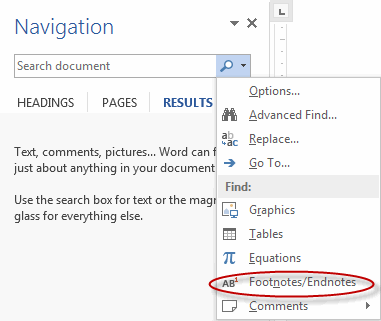
Customizing Footnotes and Endnotes
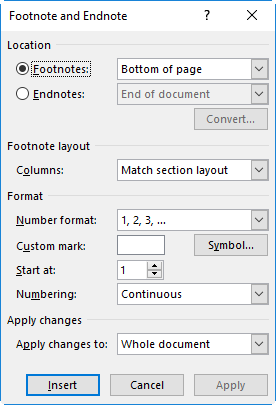
You can choose exactly where footnotes and endnotes are located, how to format the numbers, and more. To do so:
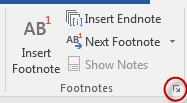
- Click the Dialog Box Launcher in the lower right corner of the Footnotes group.
- Choose the options you prefer in the Footnote and Endnote dialog box:
Working with Footnotes
Duration: 10 to 20 minutes.
In this exercise, you will add footnotes to a document and then move between the footnotes within the document.
- Open or go to Plants in my yard2.docx
- Add the following footnotes to your document:
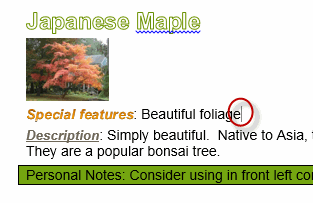
- Japanese Maple: in the Special Features section, after the words "Beautiful foliage" add a footnote stating "In the opinion of course author, Dave Dunn."
- Red Bud: in the Special Features section, after the words "Deer Resistant" add a footnote stating "Given the increasing deer population in New York State, even deer resistant plants are sometimes devoured by deer."
- Butterfly Weed: at the end of the Description, add a footnote stating "Butterfly weed is commonly found along roadways in New York State."
- Use the Footnotes commands to move to:
- Footnote #1, within the document.
- Footnote #3, within the document.
- Footnote #2, within the footnote itself.
Solution:
- Place your cursor in the document in the specified location:
- Click on the References tab and from the Footnotes group, click Insert Footnote:
- Enter "In the opinion of course author, Dave Dunn."
- Repeat steps one through three to enter the next two footnotes.
- Click anywhere in the document (above the footnotes).
- To move to the first footnote, within the document, click on the References tab and from the Footnotes group, click the drop-down arrow and select Previous Footnote until you get to the first footnote:
- To move to the third footnote, within the document, click on Next Footnote to move to the next footnote in the document:
- Click within one of the footnotes itself:

- Move to the previous or next footnote using the Previous Footnote and Next Footnote commands. Note that you will remain within the footnotes themselves, as opposed to the body of the document, until you click within the document body.
- Save the document as we will continue to build on this document in future exercises.
Inserting Citations and a Bibliography
Microsoft Word makes it very easy to cite your sources. Citations can be inserted into a document at any point and changed or updated at a later time, and sources entered in one document are available in other documents, so you don't have to re-enter them. Also, you can easily select or change the style you apply to your citations.
Inserting Citations
To insert citations into a Microsoft Word document:
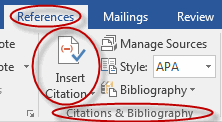
- Click on the References tab and from the Citations & Bibliography group, click Insert Citation:

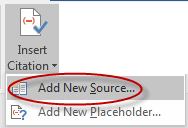
- Select Add New Source:

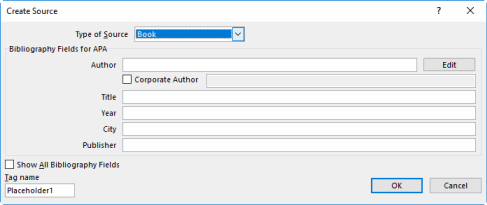
- Enter the information about the source into the Create Source dialog box:
Managing Sources
To manage sources within a Microsoft Word document:
- Click on the References tab and from the Citations & Bibliography group, click Manage Sources:
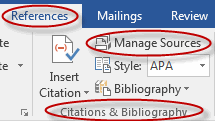
- In the Source Manager dialog box, you can copy sources into the current list (so they show up in the bibliography of the current document), delete sources, edit sources and add new sources:

Inserting a Bibliography
To insert a bibliography into a Microsoft Word document:
- Place your cursor in the document where you would like the bibliography to appear.
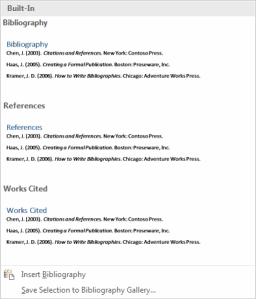
- Click on the References tab and from the Citations & Bibliography group, click Bibliography:

- From the drop-down menu, select the bibliography of your choice:
Selecting a Bibliography Style
To select or change the bibliography style within a Microsoft Word document:
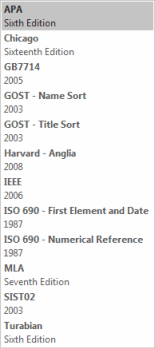
- Click on the References tab and from the Citations & Bibliography group, click the drop-down arrow next to Style:
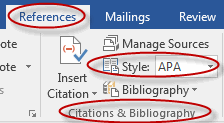
- Select the bibliography style of your choice:
Insert Citations and a Bibliography
Duration: 10 to 20 minutes.
In this exercise, you will add citations to a document and then add a bibliography to the same document.
- Open or go to Plants in my yard2.docx
- Add the following citations to your document:
- Japanese Maple: at the end of the Description, add a citation that looks like the below:
- Jack-in-the-pulpit: at the end of the Special Features section, add a citation that looks like the below:
- Japanese Maple: at the end of the Description, add a citation that looks like the below:
- Insert a bibliography at the end of the document that looks like the below:

Solution:
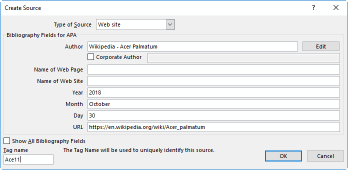
- Place your cursor at the end of the description of the Japanese Maple.
- Click on the References tab and from the Citations & Bibliography group, click Insert Citation:
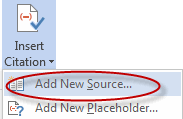
- Select Add New Source:
- Enter the information about the source into the Create Source dialog box:
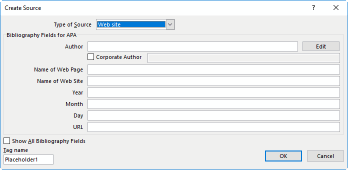
- Type of Source: Web site
- Name of Web Page: Wikipedia - Acer Palmatum
- Name of Web Site: Wikipedia
- Year Accessed: 2013
- Month Accessed: March
- Day Accessed: 25
- URL: http://en.wikipedia.org/wiki/Acer_palmatum
- Tag name: Ace11
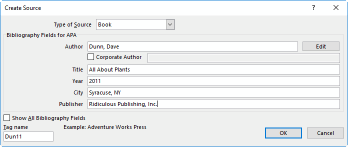
- Place your cursor at the end of the Special Features section of the Jack-in-the-pulpit.
- Click on the References tab and from the Citations & Bibliography group, click Insert Citation:
- Select Add New Source:
- Enter the information about the source into the Create Source dialog box:
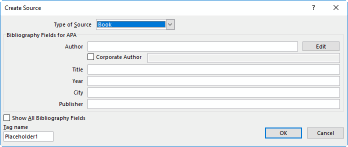
- Type of Source: Book
- Author: Dunn, Dave
- Title: All About Plants
- Year: 2011
- City: Syracuse, NY
- Publisher: Ridiculous Publishing, Inc.
- Tag name: Dun11
- Place your cursor at the end of your document.
- Click on the References tab and from the Citations & Bibliography group, click Bibliography:

- From the drop-down menu, select the top option:

Adding an Index
Adding an index to a long document makes it easy for readers to quickly locate information in the document. It is easy to add an index in Microsoft Word. First you mark the entries you would like to have appear in the index and then you insert the index.
Marking Entries
To mark entries in a Microsoft Word document:
- Select the text you wish to mark.
- Click on the References tab and from the Index group, click Mark Entry:

- In the Mark Index Entry dialog box, the selected text will appear as the Main Entry:

- Select Mark to mark only this instance of the entry for inclusion in the index. Select Mark All to select all instances of the entry for inclusion in the index.
- Click Close.
Inserting an Index
To insert an index into a Microsoft Word document:
- Place your cursor in the document where you would like the index to appear.
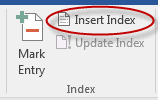
- Click on the References tab and from the Index group, click Insert Index:
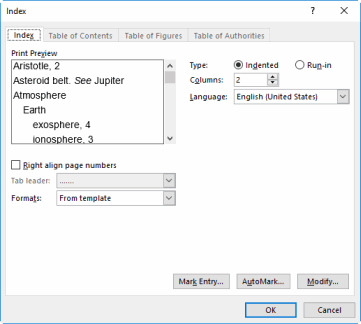
- In the Index dialog box, choose the options you prefer and click OK:
Using Index Auto-Mark Files
You can speed up the process of adding an index to a large document by creating a concordance file, which is a list of all terms you want to index, and then automating the process.
To create an concordance file and use it to auto-mark items:
- Create a two-column table in a new Word document. On the left, type words you text you want Word to search for and on the right, type the index entry for the text on the left. For a subentry, type the main item followed by a colon and the subentry. Save the file.
- Open the document to index and from the References tab, in the Index group, select Insert Index.

- Select Automark.

- Select the concordance file and click Open.

- Word searches the document and marks found entries with "XE" followed by the specified index information.

- Place the cursor where you want to insert the index and select Insert Index from the References tab.
Inserting an Index
Duration: 10 to 20 minutes.
In this exercise, you will add an index to a document.
- Open or go to Plants in my yard2.docx
- Add an index to the end of your document that looks like the below:

- Hint: you will need to mark the entries before you can add the index.
- Find the text "Attracts Butterflies" and select it.
- Click on the References tab and from the Index group, click Mark Entry:
- In the Mark Index Entry dialog box, the selected text will appear as the Main Entry:
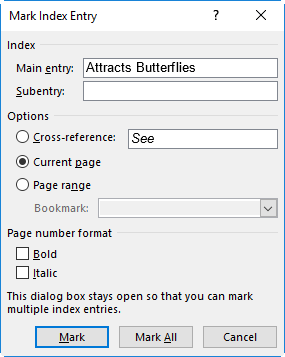
- Select Mark All to select all instances of "Attracts Butterflies" for inclusion in the index.
- Click Close.
- Repeat steps 1 - 5 to mark the other terms that will appear in the index.
- Place your cursor at the end of your document.
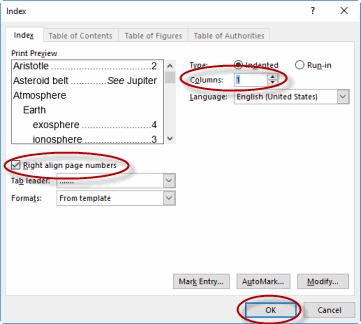
- Click on the References tab and from the Index group, click Insert Index:

- In the Index dialog box:
- Change Columns to "1".
- Check Right align page numbers.
- Click OK:
Inserting a Table of Figures
To insert a table of figures in a document:
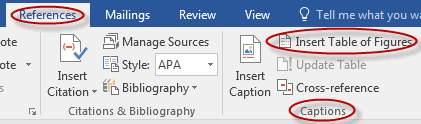
- Select the References tab, and from the Captions group, select Insert Table of Figures.
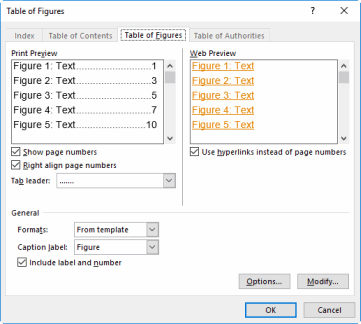
- Select table of figure options and click OK to insert it.
Inserting and Updating a Table of Authorities
To insert and update a table of authorities:
- Select the References tab, and from the Table of Authorities group, select Insert Table of Authorities.

- Set table options and click OK to insert it.
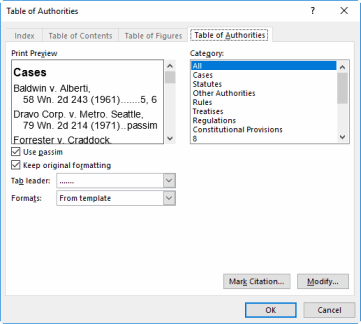
- To update the table of authorities, from the Table of Authorities group on the References tab, select Update Table.


Comments
Post a Comment