Protecting Documents In MS Word
Making Word Documents Read Only
It is sometimes desirable to let readers know a document is final so they won't edit the document. The simplest way to do this is to mark the document as final.
To mark a Microsoft Word document as final:
- From the File menu, click Info and then Protect Document:
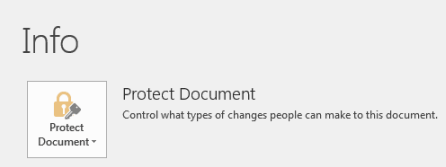
- Select Mark as Final:

- In the dialog box that appears, click OK:

- If a second dialog box appears, click OK:
 You can also check the Don't show this message again box if you do not want that dialog to come up every time you mark a document as final.
Note that the document is now clearly marked as final, but that readers may still edit the document by clicking Edit Anyway:

We will cover actually preventing readers from editing a document later in this lesson.
Password Protect Word Documents
There are two ways to password protect Microsoft Word documents to prevent others from opening them.
Password Protect Documents using File > Info > Protect Document
The first way to encrypt a Microsoft Word document with a password is:
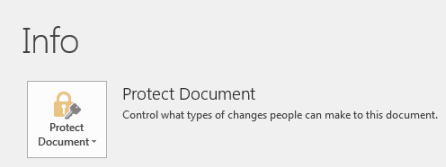
- From the File menu, click Info and then Protect Document:
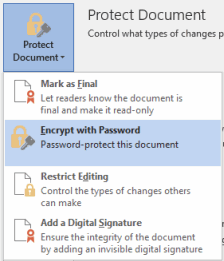
- Select Encrypt with Password:
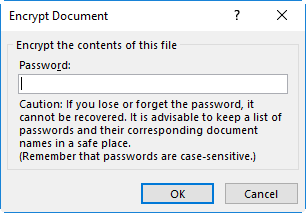
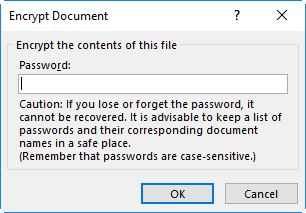
- In the Encrypt Document dialog box, enter your password and click OK:
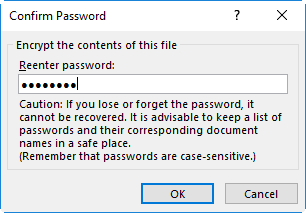
- In the Confirm Password dialog box, reenter your password and click OK:
- Save your document.
To remove or change your password, simply follow the steps above and either remove your password or enter a new password.
Password Protect Documents using File > Save As
The second way to password protect a Microsoft Word document is:
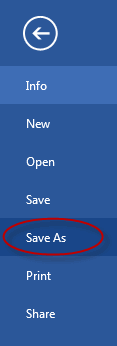
- From the File menu, click Save As:
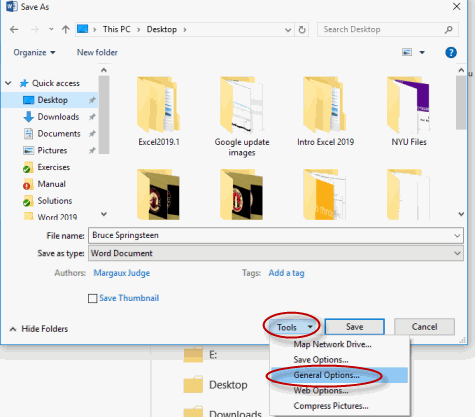
- In the Save As dialog box, click Tools and select General Options:
- In the General Options dialog box, enter password(s) to open and/or edit:
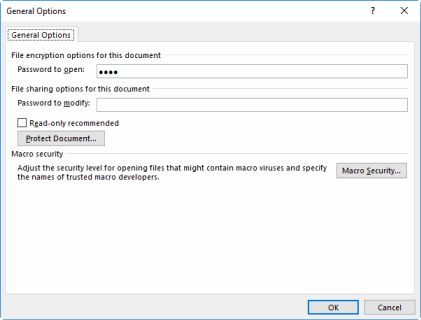
- Click OK. You'll get a reenter password dialog box to confirm the password(s), one for each type of password.
You can remove the passwords by going to the Save as dialog box, selecting the General Options in the Tools drop-down, and clearing the passwords.
Removing Metadata from Files
When sharing documents, you may wish to remove document metadata, which is hidden or personal data.
To remove document metadata:
- Select the File menu tab, and then select Info, if necessary.

- Select Check for Issues, and then select Inspect Document.
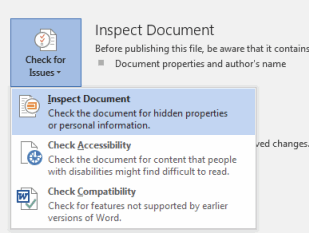
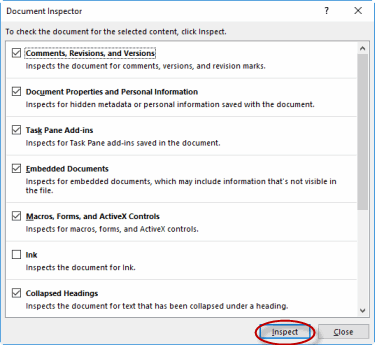
- In the Document Inspector dialog box, check the boxes to inspect for certain data, and then click Inspect.
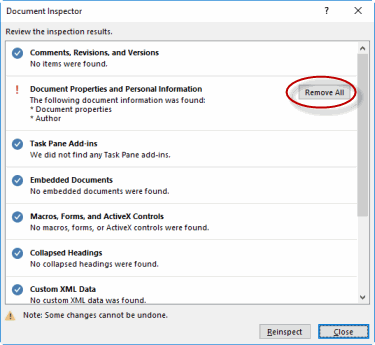
- In the results, select Remove All to remove any found data.
Restrict Formatting and Editing
Sometimes when collaborating on a document, you might wish to let people make certain types of changes, but not other types of changes. In this case you can restrict the editing and formatting options before sharing the document with others.
To restrict formatting and editing options:
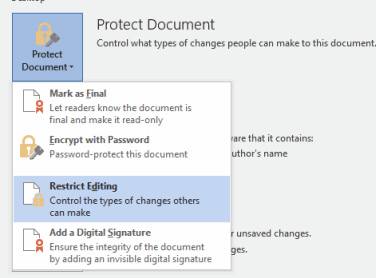
- From the File menu, click Info, then Protect Document, and then Restrict Editing to open the Restrict Formatting and Editing pane (in Word 2007, to access the Restrict Editing options, on the Ribbon, select the Review tab, and in the Protect group, select Protect Document):
- To set formatting restrictions:
- In the Restrict Editing pane, check Limit formatting to a selection of styles and click Settings:
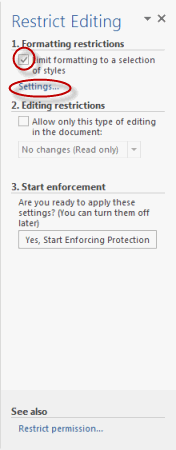
- Select or deselect styles according to the restrictions you wish to place:
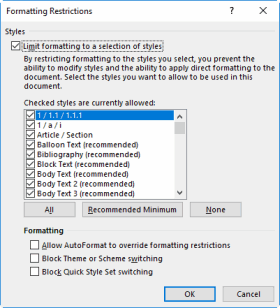
- In the dialog box that appears, choose to keep or remove styles currently in the document which you are not allowing going forward:

- In the Restrict Editing pane, check Limit formatting to a selection of styles and click Settings:
- To set editing restrictions:
- Check Allow only this type of editing in the document:
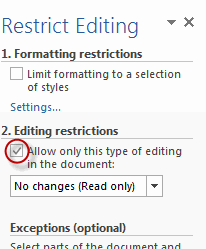
- Click the drop-down arrow to select the editing restrictions you wish to apply:
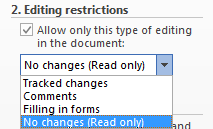
- No changes (read only): choose this option to prevent readers from making any changes to the document.
- Tracked changes: choose this option to allow changes, but require them to be tracked.
- Comments: choose this option to prevent changes but allow comments.
- Filling in forms: choose this option to allow readers to fill in forms, but not to make any other changes.
- Note that you can make exceptions to whom the editing restrictions apply:
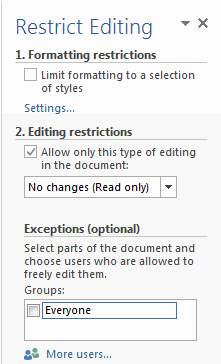
- Check Allow only this type of editing in the document:
- To start enforcing the formatting and editing restrictions you have set:
- Click Yes, Start Enforcing Protection:
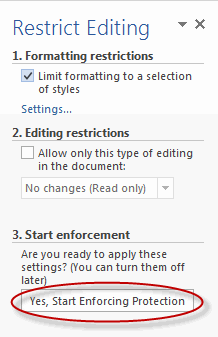
- In the dialog box that appears, enter and confirm your password and click OK:
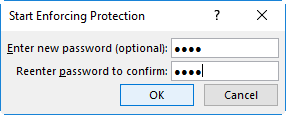
- Click Yes, Start Enforcing Protection:
Protecting a Document
Duration: 10 to 20 minutes.
In this exercise, you will mark a document as final to discourage others from editing it, password protect a document to prevent others from editing it except to leave comments and then password protect a document to prevent others from opening it.
- Navigate to the Word2019.3/Exercises folder and open Plants in my yard2.docx.
- Mark the document as final to discourage others from editing it.
- Prevent, rather than discourage, others from editing the document by password protecting it with the password "password." Do allow reviewers to add comments.
- Password protect the document to prevent others from opening it.
- Remove the password and close the document.
Solution:
- Open the document.
- To mark the document as final:
- From the File menu, select Info, Protect Document and then Mark as Final:
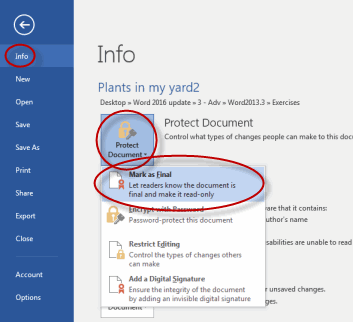
- In the dialog box that appears, click OK:

- If a second dialog box that appears, click OK again:

- From the File menu, select Info, Protect Document and then Mark as Final:
- To prevent others from editing the document by password protecting it with the password "password":
- Unmark the document as final by selecting Info from the File menu, then selecting Protect Document and then Mark as Final:

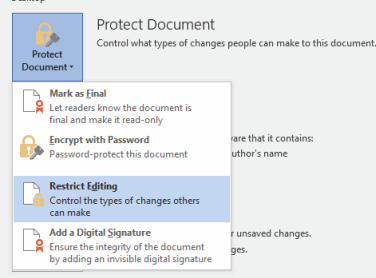
- From the File menu, click Info, then Protect Document, and then Restrict Editing to open the Restrict Formatting and Editing pane:
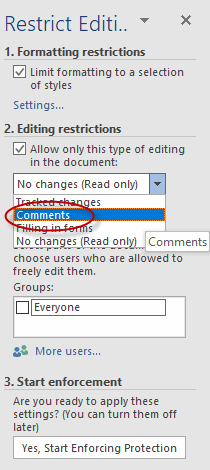
- In the Restrict Editing pane, check Allow only this type of editing in the document and select Comments:
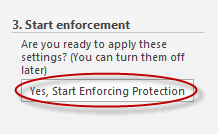
- Click Yes, Start Enforcing Protection:
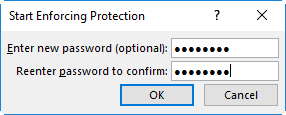
- Enter and reenter the password "password" and click OK:
- Unmark the document as final by selecting Info from the File menu, then selecting Protect Document and then Mark as Final:
- To password protect the document to prevent others from opening it:
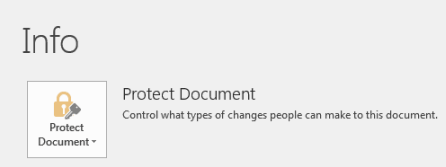
- From the File menu, click Info and then Protect Document:
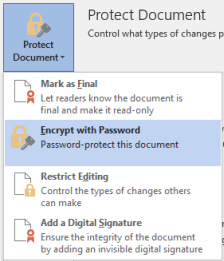
- Select Encrypt with Password:
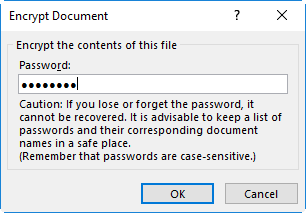
- In the Encrypt Document dialog box, enter your password and click OK:
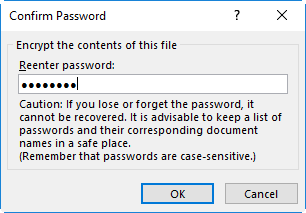
- In the Confirm Password dialog box, reenter your password and click OK:
- From the File menu, click Info and then Protect Document:
- To remove password protection from the document:
- From the File menu, click Info and then Protect Document:

- Select Encrypt with Password:

- Remove the password and click OK:
- Close the document.
- From the File menu, click Info and then Protect Document:
Comments
Post a Comment