Random Useful Items In MS Word
Using Bookmarks
Bookmarking spots in your documents makes it easy to quickly find and get back to these spots. You can even create hyperlinks to take you directly to the point you have bookmarked. Use bookmarks to:
- Note sections of your document on which you wish to come back and work later.
- Mark especially interesting sections of a document.
- Mark sections to which you wish to link from elsewhere in your document.
Adding Bookmarks
To add bookmarks to a document:
- Select the location you wish to bookmark (can be selected text or just a place in the document).
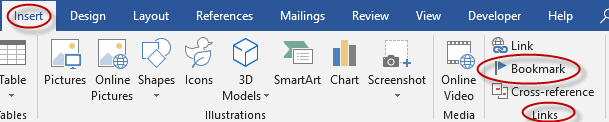
- Click on the Insert tab and from the Links group, click Bookmark:
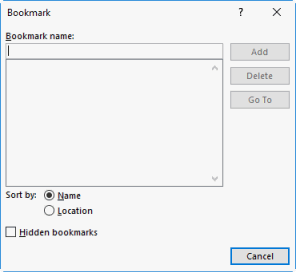
- Name the bookmark (note: spaces are not allowed in bookmark names) and click Add:
Go to a Specific Bookmark
To go to a specific bookmark within a document:
- Click on the Insert tab and from the Links group, click Bookmark:

- Select the bookmark you wish to go to and click Go To:
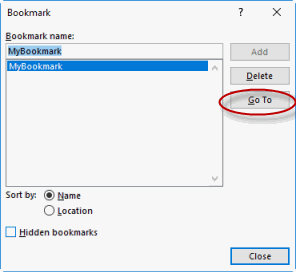
- Click Close to hide the Bookmark dialog box.
Add a Hyperlink to a Bookmark
To add a hyperlink to a bookmark:
- Select the text which will link to the bookmark.
- Click on the Insert tab and from the Links group, click Link (in previous Word versions, this option is called Hyperlink):

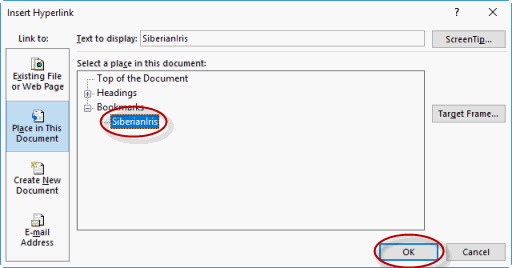
- Under Link to, select Place in This Document and then select the bookmark to which you wish to link and click OK:

Using Bookmarks
Duration: 10 to 15 minutes.
In this exercise, you will add a bookmark to a document and then create a hyperlink to that bookmark.
- Navigate to the Word2019.3/Exercises folder and open Plants in my yard3.docx.
- Bookmark the heading Siberian Iris (under Perennials).
- At the end of the document, below the index, enter "Plant to Purchase: Siberian Iris", and add a hyperlink from Siberian Iris here to the heading Siberian Iris in the document.
- Save the document.
Solution:
- Navigate to the Word2016.3/Exercises folder and open Plants in my yard3.docx.
- To bookmark Siberian Iris:
- Select the text "Siberian Iris":

- Click on the Insert tab and from the Links group, click Bookmark:

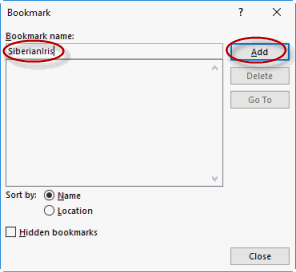
- Name the bookmark "SiberianIris" and click Add:
- Select the text "Siberian Iris":
- To add text and insert the hyperlink:
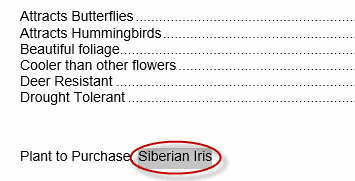
- Add the text "Plant to Purchase: Siberian Iris" below the index in the document.
- Select "Siberian Iris":
- Click on the Insert tab and from the Links group, click Link:
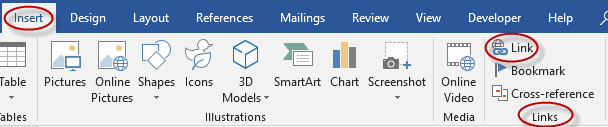
- Under Link to, select Place in This Document and then select the bookmark SiberianIris and click OK:
- Save the document.
Adding Watermarks
Watermarks are greyed out text or images which show up in the background of a document. Common uses of watermarks are:
- To mark documents as drafts.
- To mark documents as being confidential.
- To insert a logo in the background of a document.
To add a watermark to a document:
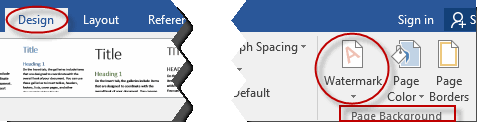
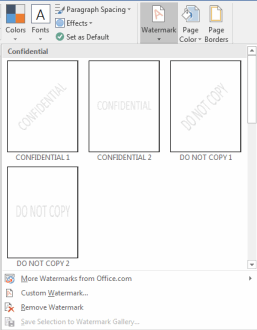
- Click on the Design tab (in Word 2010, click on the Page Layout tab) and from the Page Background group, click Watermark:
- Select a watermark or search Office.com for additional watermarks:
To add a custom watermark to a document:
- Click on the Design tab and from the Page Background group, click Watermark:
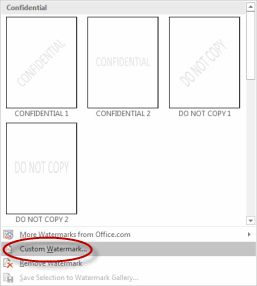
- Click Custom Watermark:
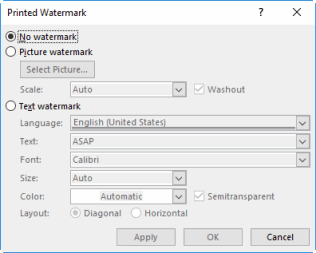
- In the Printed Watermark dialog box, select either Picture watermark or Text watermark, and then select your picture or enter your text and click OK:
Adding Custom Watermarks
Duration: 5 to 10 minutes.
In this exercise, you will add a custom watermark to a document.
- Navigate to the Word2019.3/Exercises folder and open General Terms and Conditions4.docx.
- Add a text watermark with the words "VERY ROUGH DRAFT."
Solution:
- Navigate to the Word2019.3/Exercises folder and open General Terms and Conditions4.docx.
- Click on the Design tab (the Page Layout tab in Word 2010) and from the Page Background group, click Watermark:

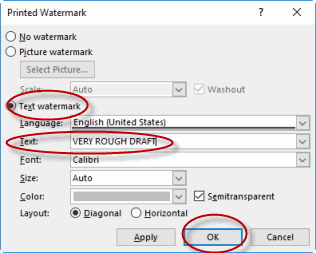
- Click Custom Watermark:

- In the Printed Watermark dialog box, select Text watermark, and then in the box labeled Text, enter "VERY ROUGH DRAFT" and click OK:
Adding Titles to Sections
You can add titles to sections in Word with headers.
To add a header title to a section in Word:
- Place your cursor within the section.
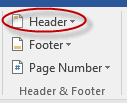
- From the Insert tab, in the Header & Footer group, select Header.
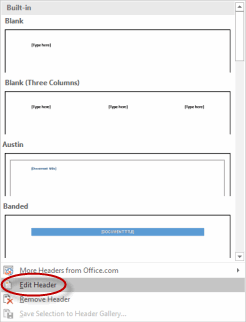
- From the drop-down list, select Edit Header.
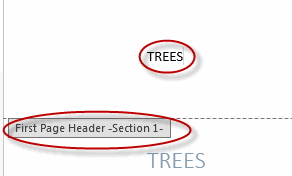
- In the section header box, add a title.
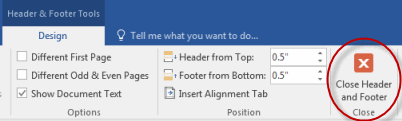
- To close out of the header area, from the Header & Footer Tools Design tab, select Close Header and Footer.
Inserting Built-in Fields
You can insert built-in fields in Word as a way to add placeholders for information that may change.
To add built-in fields:
- Place the cursor in your document where you want to insert the field.
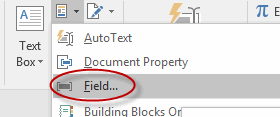
- From the Insert tab on the Ribbon, in the Text group, select Quick Parts and then select Field.
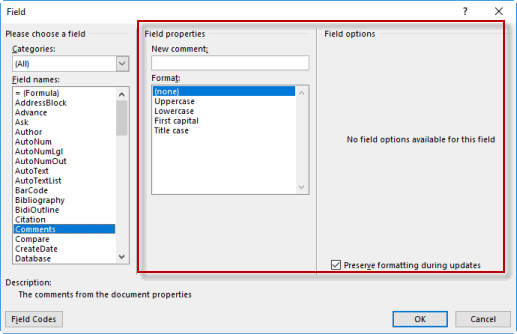
- In the Field dialog box, from the Field names list, select the field. You can filter this list by selecting Categories.
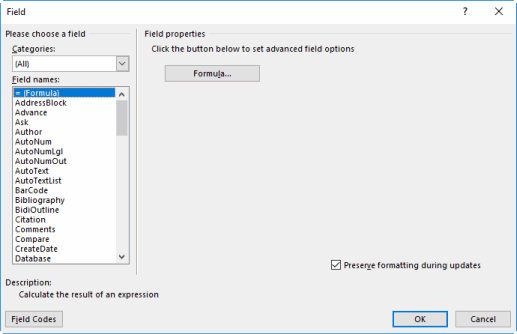
- Customize the field by selecting any properties options you desire, and then click OK to insert it.
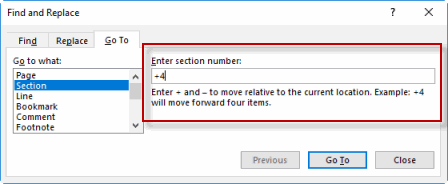
Using the Go To Feature
You can use Word's Go To feature to locate certain elements in your document.
To use Go To:
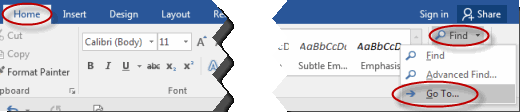
- From the Home tab, in the Editing group, select Find and then select Go To.
- On the Go To tab of the Find and Replace dialog box, use the options under Go to what to locate certain elements.
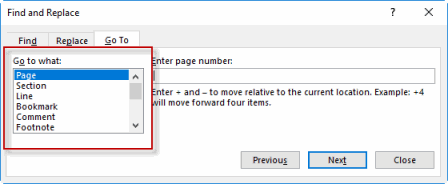
- In the text box, enter plus (+) or minus (-) and a number to move through the specified element in the document and click Go To.
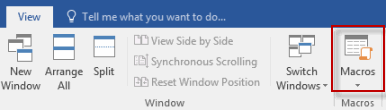
Using Macros
You can create macros in Word to help streamline your work processes. Macros are a way to group a bunch of tasks, to automate them.
To record a simple macro with a keyboard shortcut:
- From the View tab of the Ribbon, in the Macros group, select Macros.
- From the drop-down list, select Record Macro.
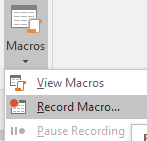
- In the Record Macro dialog box, enter a name for the macro and select Keyboard.
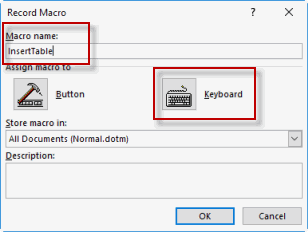
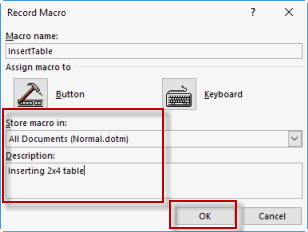
- To have the macro run with each new document, ensure that the Store macro in text box displays All Documents (Normal.dotm), and enter a Description if desired. Click OK.
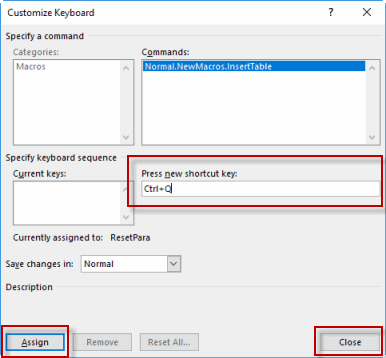
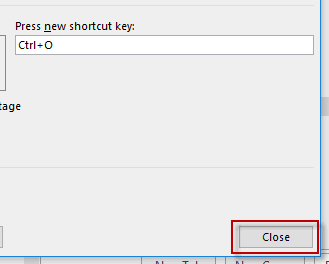
- In the Customize Keyboard dialog box, press the keyboard shortcut you want to use; it is displayed in the Press new shortcut key text box. Click Assign, and then click Close.
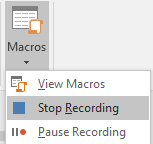
- Now perform the steps of the macro you are creating. Word displays a tape-recorder icon as it records.

- When you are done, select the Macros command again and select Stop Recording.
- You can now use this keyboard shortcut to perform the action you specified.
Copy Macros from Document to Document
To copy macros from one document to another:
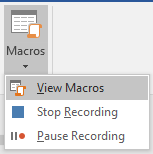
- From the View tab of the Ribbon, in the Macros group, select Macros.
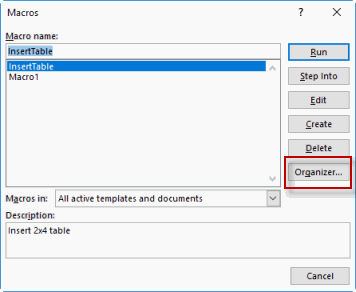
- From the drop-down list, select View Macros.
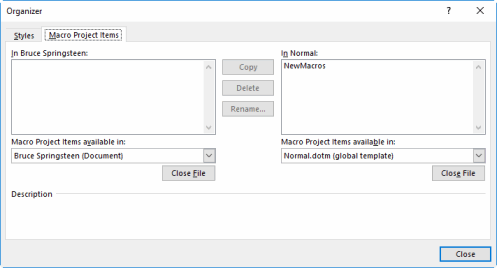
- Select Organizer in the dialog box.
- Use the Organizer to copy macros, and then click Close.
Macro Security
When you open a file that contains macros, you will see a security warning in a yellow box at the top of the document. If the document is from a trusted source, select Enable Content.

Recording a Macro
Duration: 10 to 15 minutes.
In this exercise, you will record a macro.
- Open a blank Word document.
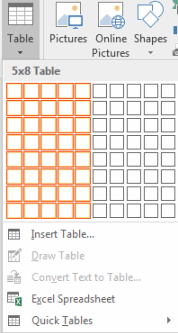
- Create a macro called "MyMacro" that is inserting a 5x8 table, using the keyboard shortcut Alt+M.
Solution:
- With a blank Word document open, select the View tab and select Macros.
- From the drop-down list, select Record Macro.
- In the Record Macro dialog box, enter the name "MyMacro" in the Macro name text box and click Keyboard.
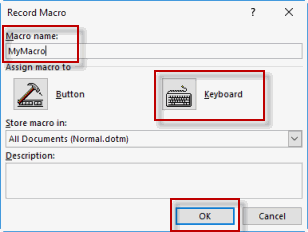
- In the Customize Keyboard dialog box, press Alt and M. Click Assign and click Close.

- Now the macro is being recorded: select the Insert tab and using the Table group, insert a table that is 5x8.
- When you are done, select the Macros command again and select Stop Recording.

Customizing the Ribbon
Customizing the Ribbon such that those commands you use most frequently appear on your home tab is a very useful way to personalize Microsoft Word.
To customize the Ribbon:
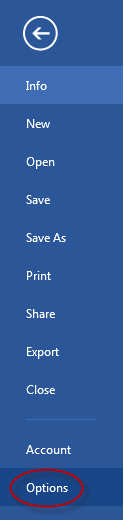
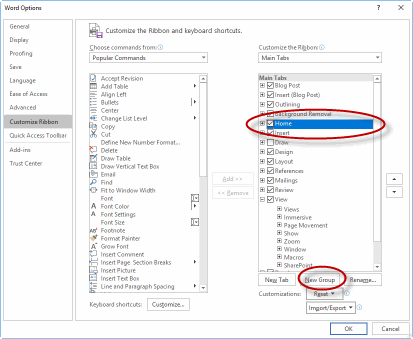
- From the File menu, select Options:
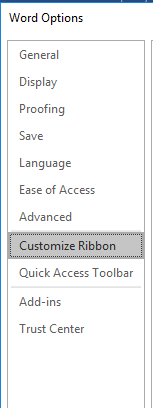
- Select Customize Ribbon:
- Create a Custom Tab or Custom Group by selecting a tab on the right and then selecting New Tab or New Group:
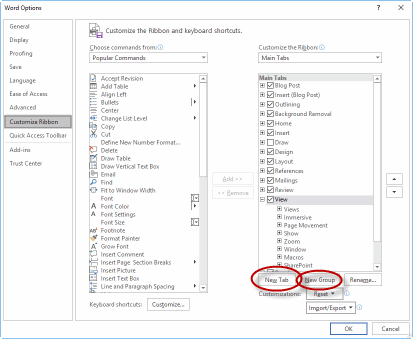
- Note that if you create a new tab, a new group is automatically created as well. This is because commands must be added to groups, not tabs, so all tabs must have at least one group.
- Select the New Tab and then Rename to name the new tab:
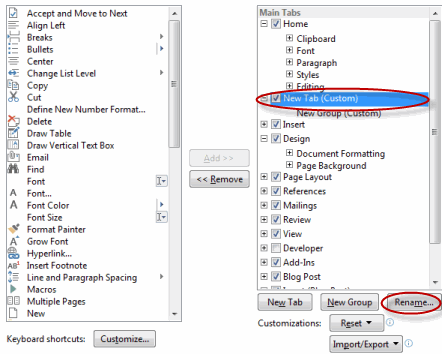
- Select the New Group and then Rename to name the new group.

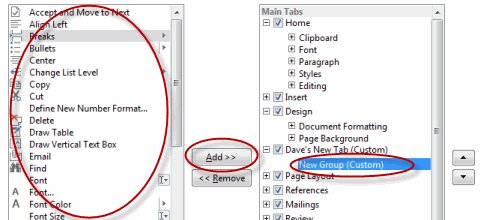
- To add a command to the new group, select the new group on the right, select a command on the left, and click Add:
Assigning Shortcut Keys
You can assign and change shortcut key combinations in Word to suit your work style.
To assign shortcut keys:
- From the File menu, select Options.
- In the Options dialog box, select Customize Ribbon.
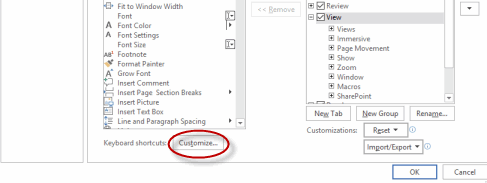
- After Keyboard shortcuts, select Customize.
- In the Customize Keyboard dialog box, select a category and command to specify.
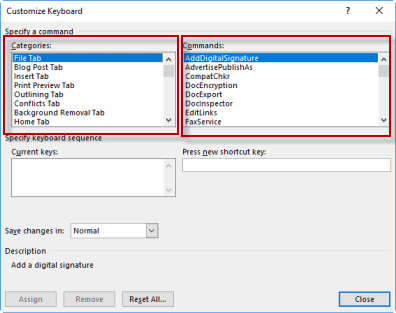
- If there is a current keyboard shortcut associated with the command, it will be displayed under Current keys.
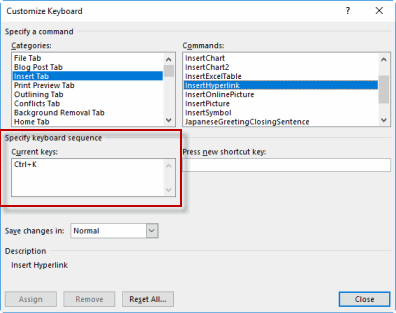
- To set a shortcut, click in the Press new shortcut key dialog box and press the key combination, and then press Close.
Customizing the Ribbon
Duration: 5 to 15 minutes.
In this exercise, you will customize the ribbon by adding a custom group to the Home tab and then adding a command to the new group.
- Open a blank Microsoft Word document.
- Add a custom group to the Home tab and name it "My Favorites."
- Add Breaks to your new custom group.
Solution:
- Open a blank Microsoft Word document.
- To add a custom group to the Home tab and name it "My Favorites":
- From the File menu, select Options:

- Select Customize Ribbon:

- Select the Home tab and then click New Group:
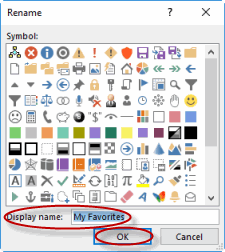
- Select the New Group and click Rename:
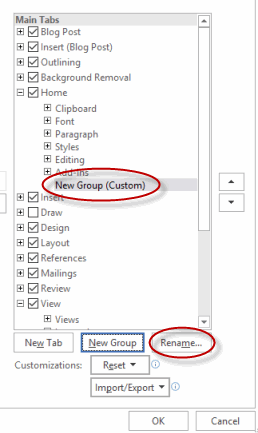
- Enter "My Favorites" as the Display name and click OK:
- From the File menu, select Options:
- To add Breaks to your new custom group:
- Select the new custom group ("My Favorites") on the right, select Break on the left (you may first need to select All Commands), and click Add:
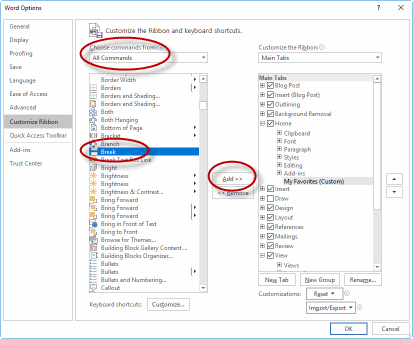
- Select the new custom group ("My Favorites") on the right, select Break on the left (you may first need to select All Commands), and click Add:
Preparing a Document for Internationalization and Accessibility
You may need your document to be able to be available to an international audience or an audience of disabled users, and if so you may need to make certain adaptations to it.
Modify Tab Order
To change the order of Ribbon tabs:
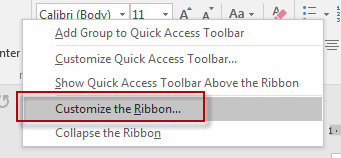
- Right-click the Ribbon and select Customize the Ribbon.
- On the right, under Customize the Ribbon, select the tab you want to move, and change its position using the arrows.
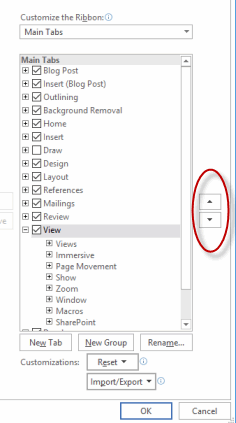
- Click OK to save the changes.
Configure Language Options
To configure language options in Word:
- Select File and then select Options.
- Select Language in the Word Options dialog box.
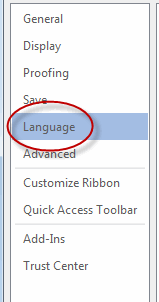
- Set language options and click OK.
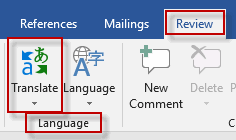
Using Microsoft Translator
New to Word 2019 on the Review is Microsoft Translator. You can use Translator to translate text into different languages.
To access Translator:
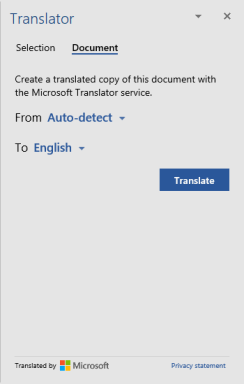
- From the Review tab, select Translate from the Language group.
- From the drop-down, choose to translate a section of the document or the entire document.
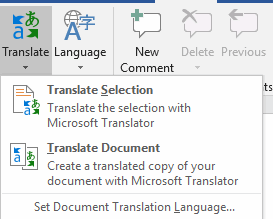
- If prompted, turn on Intelligent Services.
- The Translator tab will launch on the right.
Add Alt-Text to Document Elements
To add alt-text to document elements for disabled users:
- In an image, right-click it and select Format Picture.
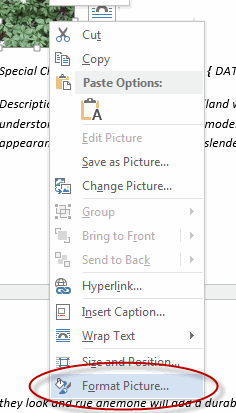
- In the Format Picture pane, select Layout & Properties and select the ALT TEXT arrow.
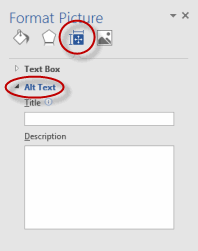
- Type a title and description.
You can also add alt-text to tables by right-clicking the table and selecting Table Properties, and then the Alt Text tab.
Create Documents for Use with Accessibility Tools
To check and modify documents for accessibility:
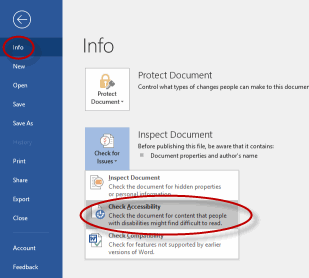
- Select the File menu tab, and from the Info section, select Check for Issues.
- From the drop-down list, select Check Accessibility.
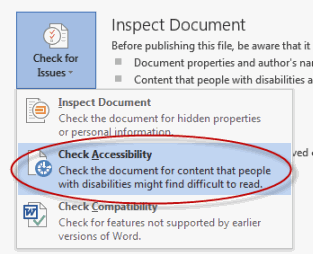
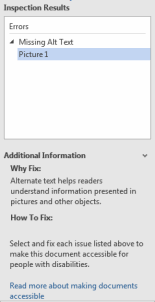
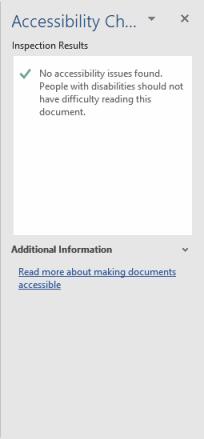
- The Accessibility Checker pane will launch, with any issues listed.
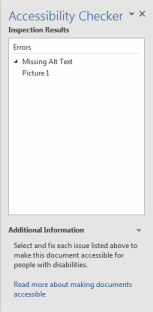
- To correct an issue, select it and view information about how to fix it.
Modify Documents for Use with Accessibility Tools
Word 2019 has been updated to support international standards of accessibility. To check and modify worksheets for accessibility:
- Select the File menu tab, and from the Info section, select Check for Issues.
- From the drop-down list, select Check Compatibility.
- The Accessibility Checker pane will launch, with any issues listed.
- To correct an issue, select it and view information about how to fix it.
Accessibility: Using Sounds
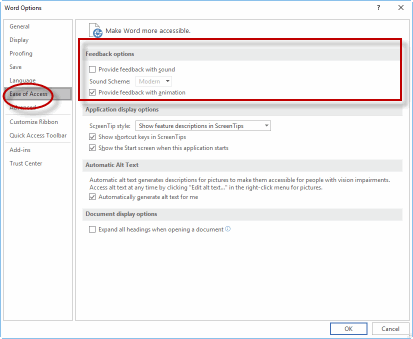
You can add sounds in Word to provide audio cues. To do so, select File > Options.
Select Ease of Access on the left, and then use the Feedback options section to turn on sound effects.
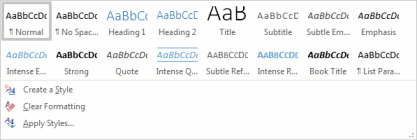
Manage Multiple Options for +Body and +Heading Fonts
To manage multiple options for +Body and +Heading fonts:
- Select the Home tab of the Ribbon.
- In the Styles group, select the Styles drop-down arrow.

- From the drop-down list, select a body or heading option.
Apply Global Content Standards
To help ensure that your documents are accessible to a global audience, follow these guidelines:
- Use standard fonts, such as Times New Roman and Arial.
- Make sure sentences are not overly long. They should be concise and as short as possible.
- Avoid jargon that may not translate correctly to other languages.
- Avoid country-specific examples that will not make sense to users from different countries.
Using the Cloud
One of the newer features of the Microsoft Office suite is the ability to save, share, and collaborate with others using the cloud. You can save, share, and access your Word documents on SharePoint or OneDrive (formerly called SkyDrive).
OneDrive provides account holders with a certain amount of free cloud storage.
You will need a OneDrive account to perform the following. If you do not have one, go to https://onedrive.live.com to sign up.
To save and share a document to OneDrive:
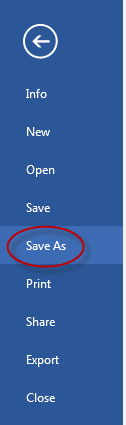
- Add OneDrive to your list of Places in Word, by selecting the File menu, and then clicking Save As.
- Click Add a Place.
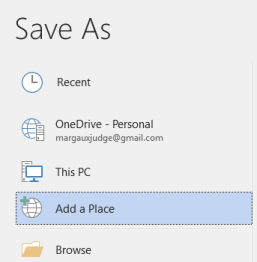
- In the Add a Place section, select OneDrive.

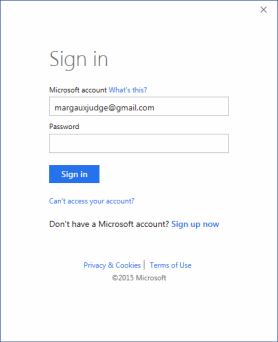
- In the Add a service dialog box, enter your email address and click Next.

- Enter your password and click Sign in.
- To save your document to the cloud and share it, select the File menu and click Share.
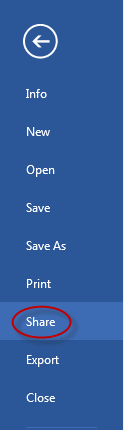
- Click Save To Cloud.

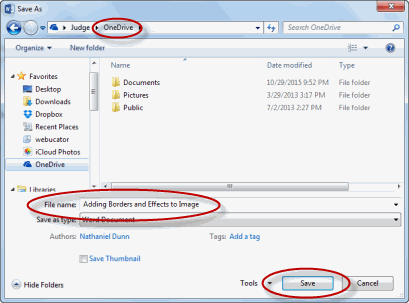
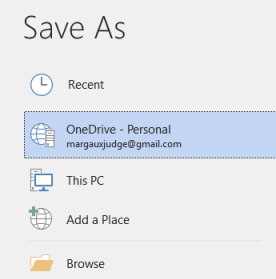
- In the Save As section, click your OneDrive account.

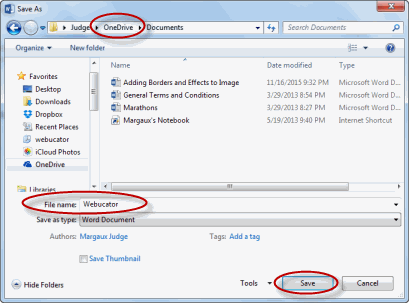
- Click Browse and navigate to the OneDrive folder you want to use, and then name your document and click Save.
- Log in to your OneDrive account in a web browser at: https://onedrive.live.com/.
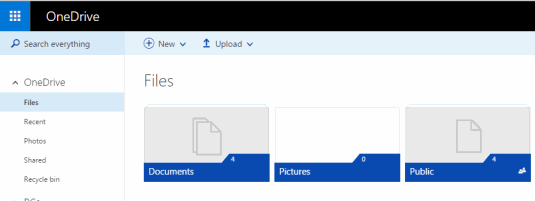
- Navigate to your document and select the check box.

- Select Share.
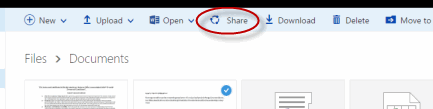
- Type the recipient's email address and a message, if desired. Select the Recipients can edit option if you want to give the recipient read-only access. When done selecting options, click Share.
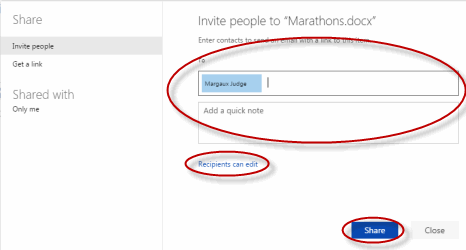
- Your recipient can now view and change (if you did not uncheck the Recipients can edit check box) your document.
Using the Cloud
Duration: 10 to 15 minutes.
In this exercise, you will save a Word document to OneDrive. (To perform this activity, you must have a OneDrive account. To obtain a OneDrive account, go to https://onedrive.live.com.)
- Navigate to the Word2019.3/Exercises folder and open Webucator.docx.
- Save the document to a folder in your OneDrive.
Solution:
- Click Add a Place.

- In the Add a Place section, select OneDrive.

- In the Add a service dialog box, enter your email address and click Next.

- Enter your password and click Sign in.

- To save your document to the cloud and share it, select the File menu and click Share.

- Click Save To Cloud.

- In the Save As section, click your OneDrive account.
- Click Browse and navigate to the OneDrive folder you want to use, and then name your document and click Save.
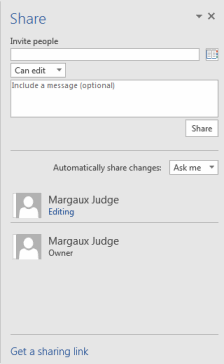
Sharing
You can share your Word documents with others using the Share option on the File menu.
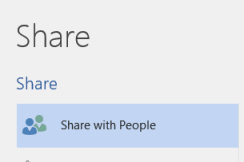
First you need to save the document to SharePoint or OneDrive. Then, select the Share with People option.
In the Share pane, you can invite people to share or edit the workbook.
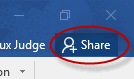
You can also click the Share button in the upper-right corner of the document to quickly access the Share options.


Comments
Post a Comment