The Reviewing Pane,Viewing Markup,Accepting and Rejecting Changes In MS Office
The Reviewing Pane
The reviewing pane shows all insertions, deletions, formatting changes and other changes, as well as all comments, in a separate window. You can move from one change to another in your document by selecting the change in the reviewing pane.
To show or hide the Reviewing pane:
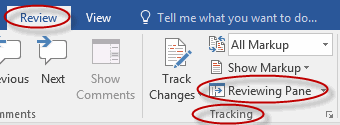
- Click on the Review tab and from the Tracking group, click Reviewing Pane:
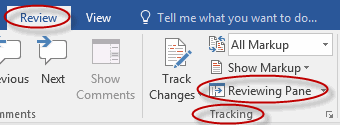
- Click it a second time to hide (or show) it.
Choosing what Changes to Show
If a document is heavily marked up, it is often useful to focus exclusively on certain types of changes or markup. To choose what markups to show and to how you want to see them:
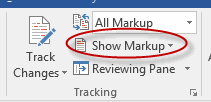
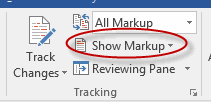
- Click on the Review tab and from the Tracking group, click Show Markup:
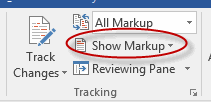
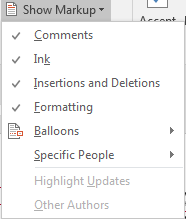
- In the Show Markup drop-down list, select or deselect items by clicking on them:
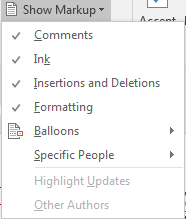
The Show Markup command allows you to show or hide the following things:
- Comments
- Ink
- Insertions and Deletions
- Formatting
The Show Markup command also allows you to choose:
- Where to see markup: inline or in balloons.
- Whose comments to see. Select All Reviewers or only those reviewers whose markup you wish to review.
Viewing Different Versions
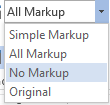
You can easily switch back and forth between the original and final versions of a document, both with or without markup showing. Specifically, you can display a document in the following ways:
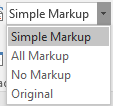
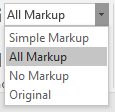
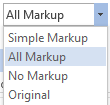
- Simple Markup. Cleaned up version of the document with changes indicated. To see the changes, click on a red change indicator line on the left.
- All Markup. The final document, with all proposed changes showing.
- No Markup. The final document, without proposed changes showing.
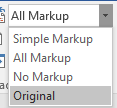
- Original. The original document, without proposed changes showing.
These options differ slightly in Word 2010.
To change the way a document is displayed:
- Click on the Review tab and from the Tracking group, click Simple Markup (the Display for Review command) (in Word 2010, choose Final: Show Markup):
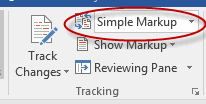
- From the Display for Review drop-down list, select one of the options:
Viewing Markup
Duration: 10 to 20 minutes.
In this exercise, you will use the Reviewing pane to locate changes in a document, use the Show Markup command to show various changes, and use the Display for Review command to display the document before, after and with markup.
- Open or go to General Terms and Conditions.docx
- Show the Revisions pane. If it is already showing, hide it and then show it again.
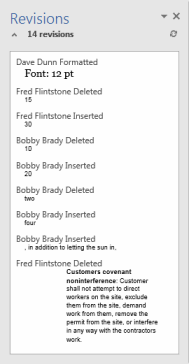
- Locate the place where text was inserted into the document by clicking on it in the Revisions pane.
- Use the Show Markup command to:
- Show only comments.
- Show only formatting changes.
- Show only insertions and deletions.
- Show revisions in balloons (if revisions are already showing in balloons, then switch to showing them inline).
- Use the Display for Review command to:
- Display the original version of the document.
- Display the final version of the document with all markup showing.
- Hint: markup which is not checked when clicking the Show Markup command will not show up in any of the Display for Review options.
- Display the final version of the document without markup showing.
- Save your changes as we will be using this document in future exercises.
Solution:
- Open or go to the document.
- Click on the Review tab and from the Tracking group, click Reviewing Pane:
- In the Revisions pane, locate the inserted text and click on it:
- Click on the Review tab and from the Tracking group, click Show Markup:
- In the Show Markup drop-down list, deselect all items except Comments by clicking on them:
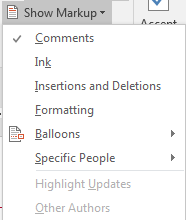
- In the Show Markup drop-down list, deselect Comments and select Formatting by clicking on them:
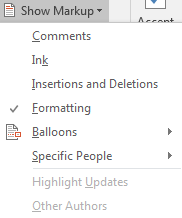
- In the Show Markup drop-down list, deselect Formatting and select Insertions and Deletions by clicking on them:
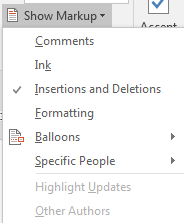
- In the Show Markup drop-down list, select Balloons and then Show Revisions in Balloons:
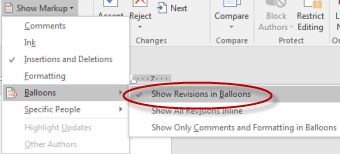
- In the Show Markup drop-down list, deselect all items except Comments by clicking on them:
- Click on the Review tab and from the Tracking group, click All Markup (the Display for Review command):
- Select Original:
- In the Show Markup drop-down list, select all unselected items by clicking on them:
- Click Simple Markup (the Display for Review command) and select All Markup (in Word 2010, select Final: Show Markup):
- Click Simple Markup (the Display for Review command) and select No Markup (in Word 2010, select Final):
- Select Original:
- Save your changes as we will be using this document in future exercises.
Accepting and Rejecting Changes
The ability to track changes in a document is very helpful when collaborating on documents. However, someone ultimately has to finalize the document, and in so doing they have to decide whether to accept or reject the changes that have been recommended and made.
There are four options available for accepting and rejecting changes:
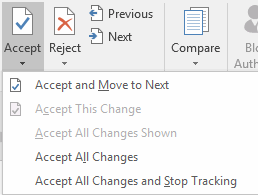
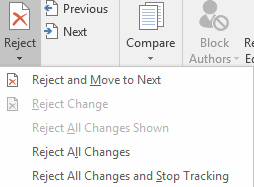
- Accept / Reject and Move to Next. Use these to accept or reject a change and jump to the next change in the document.
- Accept / Reject. Use these to accept or reject just one change.
- Accept / Reject All Changes Shown. Use this option to accept or reject changes in groups based on the type of change or based on the reviewer.
- Accept / Reject All Changes in Document. Use this option to accept or reject all changes in the document.
To accept changes in a Microsoft Word document:
- Click on the Review tab and from the Changes group, click Accept:

- Click Accept on the top to accept the change and move to the next change.

- Click Accept on the bottom to accept a change and not move to the next change, to accept all changes shown or, or to accept all changes in the document.
- Click Accept on the top to accept the change and move to the next change.
To reject changes in a Microsoft Word document:
- Click on the Review tab and from the Changes group, click Reject:

- Click Reject on the top to reject the change and move to the next change.

- Click Reject on the bottom to reject a change and not move to the next change, to reject all changes shown, or to reject all changes in the document.
- Click Reject on the top to reject the change and move to the next change.
To move between changes in a Microsoft Word document:
- Click on the Review tab and from the Changes group, click Previous to move to the previous change and click Next to move to the next change:

Version History
To view the changes that have been made to your document, you can select History from the File menu tab.
Accepting and Rejecting Changes
Duration: 15 to 25 minutes.
In this exercise, you will accept and reject changes by reviewer and type.
- Navigate to the Word2019.3/Exercises folder and open General Terms and Conditions2.docx.
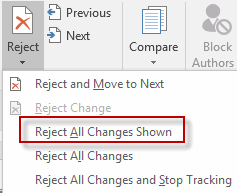
- Reject all changes made by Fred Flintstone.
- Accept all formatting changes.
- Accept all changes except the deletion of Section 10 (Excess Materials), which should be rejected.
- Save the document.
Solution:
- Open the document.
- To reject all changes made by Fred Flintstone:
- Click on the Review tab and from the Tracking group, click Show Markup:
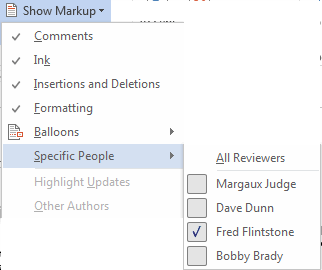
- Deselect Dave Dunn, Bobby Brady, and Margaux Judge by clicking on their names (you will need to do one and then the other), so that only Fred Flintstone's changes will show:
- In the Changes group, click the Reject drop-down and then Reject All Changes Shown:
- Click on the Review tab and from the Tracking group, click Show Markup:
- To accept all formatting changes:
- Click on the Review tab and from the Tracking group, click Show Markup:

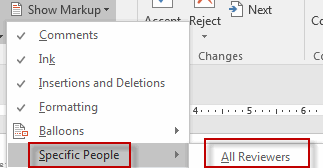
- Select All Reviewers:
- Click on the Review tab and from the Tracking group, click Show Markup:

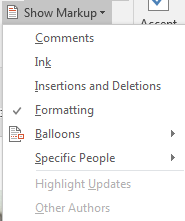
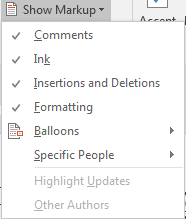
- Deselect all options except Formatting (you will need to deselect each item individually):
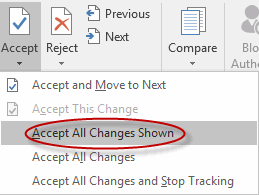
- In the Changes group, click the Accept drop-down and then Accept All Changes Shown:
- Click on the Review tab and from the Tracking group, click Show Markup:
- To reject the change to Section 10 and accept all other changes:
- Click on the Review tab and from the Tracking group, click Show Markup:

- Select each option (you will need to select each item individually):
- Place your cursor in Section 10.
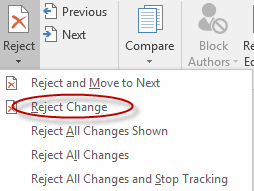
- In the Changes group, click the Reject drop-down and select Reject Change:
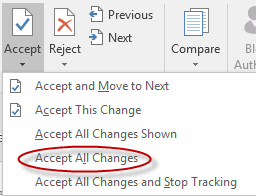
- In the Changes group, click the Accept drop-down and then Accept All Changes (in Word 2007/2010, the option is Select All Changes in Document):
- Click on the Review tab and from the Tracking group, click Show Markup:
- Save the document.
Comments
Post a Comment