Working with Illustrations
Lesson Goals
- Learn to insert charts into Microsoft Word documents.
- Learn to edit charts in Microsoft Word documents.
- Learn to use clip art to illustrate your documents.
- Learn to insert shapes into Microsoft Word documents.
- Learn to use SmartArt to illustrate your documents.
- Learn to use captions.
- Learn to use Word Building Blocks.
Adding and Editing Charts
To insert a chart into a Microsoft Word document:
- Place your cursor in the location in your document in which you would like to insert the chart.
- From the Insert tab, in the Illustrations group, click Chart:

- In the Insert Chart dialog box, select the type of chart you want by clicking on it in the left column:
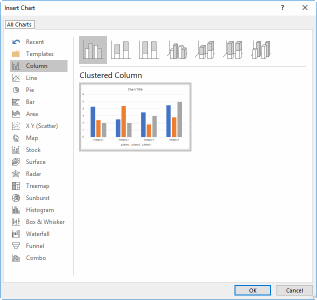
- Select a specific chart on the right and click OK:

- Note that the chart now appears in your document and a Microsoft Excel spreadsheet opens up:

- To edit the chart:
- Type over the axis labels and data with your own axis labels and data.
- Resize the chart by dragging the box representing the range.
Working with Charts
Selecting a chart in Word brings up the Chart Tools tabs:
- Design:

- Format:

In Word 2010, there is a Layout Chart Tools tab available, as well. Also, the tabs look different in each version of Word.
Working with Charts
Duration: 15 to 25 minutes.
In this exercise, you will add a chart to a document and then edit the design and layout of the chart.
- Open or go to Plants in my yard - Intermediate.docx.
- Insert a chart at the end of the document that looks like the one shown below (the data labels are listed below the image for easier reading):

- Attracts Butterflies
- Deer Resistant
- Drought Tolerant
- Attracts Hummingbirds
- Cooler than Other Flowers
- Beautiful Foliage
- Save your document.
Solution:
- Place your cursor on a new line at the end of the document.
- From the Insert tab, in the Illustrations group, click Chart:
- Select the 3-D Stacked Column chart (in Word 2010, Stacked Column in 3-D) and click OK:

- Edit the data in Microsoft Excel as follows:
- Delete columns C and D by selecting the columns, and then right-clicking.

- Click Delete and then select Table Columns (in Word 2010, just click Delete).

- Add two rows to the data range by dragging the lower right corner of the range down:

- Type in the six attributes and the corresponding counts in cells A2:B7. Then type "Count of Attributes" in cell B1:

- Select the chart by clicking on it. Click the plus sign to the right of the chart. In the Chart Elements box, scroll to and uncheck the Legend check box.

- Select the chart columns by clicking on one of them. On the Chart Tools Format tab, click Shape Fill and then select Red:

- Save the file.
- Delete columns C and D by selecting the columns, and then right-clicking.
In Word 2010, to turn the data labels on, on the CHART TOOLS LAYOUT tab, click Data Labels and then click Show. To turn the legend off, on the Chart Tools > Layout tab, click Legend and then click None.
Working with Clip Art
A large library of Clip Art, including drawings, videos, sounds and photographs, is available from Office.com. To insert Clip Art into your document:
- From the Insert tab, in the Illustrations group, click Online Pictures (in Word 2010, this option is called Clip Art):

- In the Insert Pictures dialog box that appears:
- Type in your search word(s) and press Return.
- View the results of your search:

In Word 2010, you will use the Clip Art dialog box that appears at the right to search for and select clip art files.
Working with Clip Art
Duration: 5 to 15 minutes.
In this exercise, you will search for Clip Art available from Office.com and insert an image into a document.
- Open or go to Plants in my yard - Intermediate.docx.
- Insert and customize a cover page in the document by:
- From the Insert tab, in the Pages group, click Cover Page and then select "Banded" (if you are using Word 2010, select an available option):

- Delete the circled text in the image below by selecting it and pressing Delete on your keyboard (you might have to press Delete twice):

- From the Insert tab, in the Pages group, click Cover Page and then select "Banded" (if you are using Word 2010, select an available option):
- Insert a picture of a flower from Clip Art on your cover page.
- Save your document.
Solution:
- From the Insert tab, in the Illustrations group, click Online Pictures (if you are using Word 2010, select Clip Art):

- In the Insert Picture dialog box, search for "flower":

- Select the picture of your choice by double-clicking it.
- If necessary, resize the picture so that it fits on the cover page.
- Save your document.
Using Shapes
You can easily add a wide variety of shapes to your Microsoft Word documents, including squares, circles, stars, arrows, smiley faces, lines, equation shapes, callouts, and more. To insert a shape into a Microsoft Word document:
- From the Insert tab, in the Illustrations group, click Shapes:

- Select a shape by clicking on it:

- Your cursor will change to a plus sign:

- Click down in your document where you would like to place the shape, drag your mouse until the shape is the size you want it to be and then release your mouse.
Selecting a shape in Word brings up the Drawing Tools Format tab (this tab will look different in Word 2010): 
Positioning Shapes
To position shapes:
- After inserting the shape, click it to select it.
- With the cursor as a four-pointed arrow, click and drag to position the shape.

Shape Formatting
Beginning in Word 2016, when you insert a shape into a document, you can now choose from preset fills and colors. When you insert the shape, the Drawing Tools Format tab opens, containing the presets.
Wrapping Text Around Shapes
To wrap text around shapes:
- With the shape selected, select the Layout Options icon.

- Select a text-wrapping option.

Working with Icons
New in Word 2019 is the ability to insert Scalable Vector Graphics (SVGs), or icons. To do so, from the Insert tab in the Illustrations group, select Icons.
The Insert Icon dialog box opens. To insert an icon, click it and then click Insert. 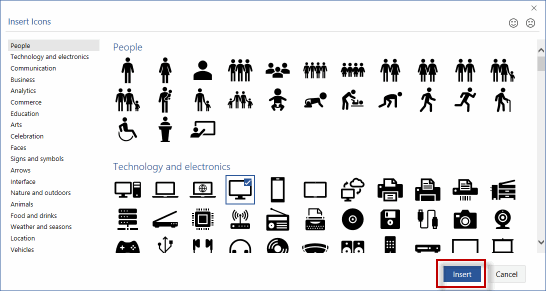
The icon is now inserted into your document. You can click and drag to move it or rotate it. 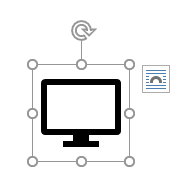
Using 3D Models
Another new feature of Word 2019 is the ability to insert a 3-D model. To do so:
- From the Insert tab, in the Illustrations group, select 3D Model drop-down list, and then choose to select a model from a file or from an online source.

- Search for and select a 3-D model to use to insert it into your document.

The 3-D model is now inserted into your worksheet. You can click and drag to move it or rotate it. 
Adding Shapes
Duration: 5 to 10 minutes.
In this exercise, you will add a shape to a document.
- Open or go to Plants in my yard - Intermediate.docx.
- Insert a Smiley Face Shape in the footer of the document such that your footer looks like the screenshot below:

- Save your document.
Solution:
- Double-click in the Footer to make the Footer the active part of your document.
- From the Insert tab, in the Illustrations group, click Shapes:

- Select the Smiley Face shape under Basic Shapes:

- Place the smiley face in the footer of the document and drag it until you are happy with the size.
- From the Drawing Tools Format tab, in the Shape Styles group, click Shape Fill and select Red:

- Save the document.
Working with SmartArt
SmartArt diagrams include process diagrams, list diagrams, hierarchy diagrams, pyramid diagrams and much more.
Inserting SmartArt
To insert SmartArt:
- Place your cursor in the location in your document where you want your SmartArt graphic to appear.
- From the Insert tab, in the Illustrations group, click SmartArt:

- In the Choose a SmartArt Graphic dialog box, select a SmartArt graphic to preview it on the right:

- Click OK to add the SmartArt Graphic to your document.
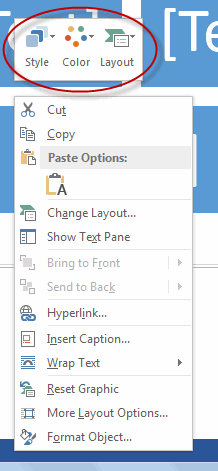
Selecting a SmartArt diagram in Word brings up the SmartArt Tools tabs:
- Design:

- Format:

Modifying SmartArt
Right-click the SmartArt and then use the available options, including the SmartArt Quick Styles at the top, to modify the SmartArt.
Positioning SmartArt
To position SmartArt, once inserted, you can move the SmartArt by clicking and dragging it. Hover your cursor over the SmartArt and when it turns to a four-headed arrow, you can click and drag.
Working with SmartArt
Duration: 10 to 20 minutes.
In this exercise, you will add a SmartArt graphic showing the relationships between the plants in the document in which we have been working.
- Open or go to Plants in my yard - Intermediate.docx.
- Insert a SmartArt graphic at the end of your document that looks like the image below (the plant names are listed below the image for easier reading):

- Plants
- Trees
- Japanese Maple
- Lilac
- Red Bud
- Trees
- Perennials
- Columbine
- Butterfly Weed
- Purple Coneflower
- Bleeding Heart
- Jack-in-the-pulpit
- Siberian Iris
- Ground Covers
- Lamb's Ear
- Sedum
- Anemone
- Plants
- Save your document.
Solution:
- Place your cursor at the end of your document, a line below the "Count of Attributes" image.
- From the Insert tab, in the Illustrations group, click SmartArt:

- In the dialog box that opens, click Hierarchy and then the image titled Hierarchy, and then OK:

- From the SmartArt Tools Design tab, in the Create Graphic group, click Text Pane:

- Enter text and add additional boxes in the second and third rows by typing and pressing Enter and Tab:

- From the SmartArt Tools Format tab, in the Shape Styles group, click Shape Fill and then select a color:

- Save the document.
Creating Captions
You may want to add captions to your Word elements. You can add captions to tables, figures, and images, and then customize those captions.
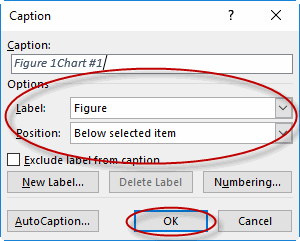
To add a caption to an image:
- Right-click the image and select Insert Caption.

- In the Caption dialog box, type the caption in the Caption: text box.
- Select a Label. To exclude a label, select the Exclude label from caption check box.
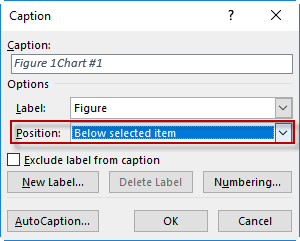
- Select where to position the caption from the Position drop-down list. Click OK to insert the caption.
Modify Caption Properties
You can change caption formats when adding them in Word using the options in the Caption dialog box.
- To exclude the label in the caption, select the Exclude label from caption check box.
- To change position of the caption, select options in the Position drop-down list.
Using Cross-References
You can use cross-references to refer to figures in your documents, so that if the figure numbers change, this information will automatically update.
To create a cross-reference:
- Put your cursor where you want the cross-reference to appear.
- From the References tab, in the Captions group, select Cross-reference.

- In the Cross-reference dialog box, select the reference type and other options.

- In the For which... section, select the item you want to reference and select Insert.

Using Building Blocks
Word provides a feature called Building Blocks, reusable text or graphics or other elements that can help you be more efficient. Word provides a Building Blocks library and you can also create your own.
To use a Building Block:
- From the Insert tab of the Ribbon, in the Text group, select Quick Parts and from the drop-down, select Building Blocks Organizer.

- Select the Building Block on the left to see a preview of it on the right.

- To insert it in your document, select Insert.

To create and save a Building Block:
- Select the text or image element that you want to use to create a Building Block.
- From the Insert tab of the Ribbon, in the Text group, select Quick Parts and from the drop-down, select Save Selection to Quick Part Gallery.

- In the Create New Building Block dialog box, select a name for the Building Block, as well as any other options, and click OK to save it.

- It is now available for reuse.
Inserting Text Boxes
To insert a Building Block text box:
- From the Insert tab of the Ribbon, in the Text group, select Quick Parts and from the drop-down, select Building Blocks Organizer.
- Scroll down until you see the text box options in the Gallery column.

- To insert a text box option, select it, preview it on the right, and click Insert.

Moving Building Blocks between Documents
Once you have saved a Building Block, it is saved as a template. To use it in another document, access it via the Quick Parts drop-down list.
Editing Building Block Properties
To edit Building Block properties:
- From the Insert tab, in the Text group, select Quick Parts and from the drop-down, select Building Blocks Organizer.
- Select the Building Block to edit, and select Edit Properties.

- Modify the Building Block and click OK to save the changes.

Inserting a Building Block in a Document
Duration: 5 to 10 minutes.
In this exercise, you will insert a Building Block in a Word document.
- Open a new, blank Word document.
- Insert in the document a Building Block cover page of your choice.
Solution:
- With a new, blank document open, from the Insert tab of the Ribbon, in the Text group, select Quick Parts and from the drop-down, select Building Blocks Organizer.

- Scroll through and select a cover page Building Block (you will see the Cover Page listings under Gallery).

- To preview the cover page, click it and view it on the right. To insert it, select Insert.


Comments
Post a Comment