Working with Images
Lesson Goals
- Learn to insert images into a Microsoft Word document.
- Learn to place and size images in a Microsoft Word document.
- Learn to wrap text around images.
- Learn to adjust the look and feel of images.
- Learn to add borders and effects to images.
Inserting Images
To insert an image into a Microsoft Word document:
- Place your cursor in your document where you would like the image to appear.
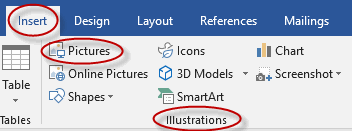
- Click on the Insert tab and from the Illustrations group, click Pictures (named Picture in Microsoft Word 2010):
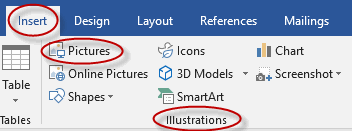
- Select a picture (a file such as a photo or logo which you have access to on your hard drive or local network) in the Insert Picture dialog box and click Insert.
Adding Quick Styles to Images
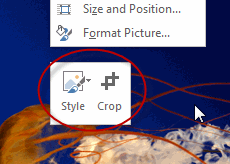
You can adjust your image using Quick Styles. Right-click the image, and use the Quick Styles options to crop or alter the image.
Inserting a Screen Shot or Screen Clipping
You can insert a screen shot or a screen clipping into a Word document. To insert a screen shot or screen clipping:
- Place your cursor in the document where you want the screen shot or clipping to appear.
- Select the Insert tab, and from the Illustrations group, select the Screenshot drop-down list.
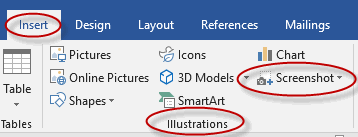
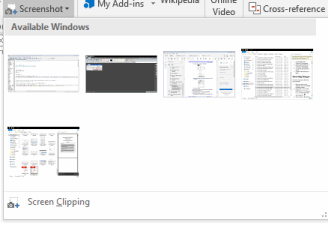
- Select an available screen shot, or select Screen Clipping to insert a portion of a screen.
Insert an Image into a Microsoft Word Document
Duration: 5 to 10 minutes.
In this exercise, you will insert an image into a Microsoft Word document.
- Open or go to Plants in my yard - Intermediate.docx.
- Insert Lilac closeup.gif from the Word2019.2/Exercises folder to the right of the existing image in the Lilac section.
- Save the document as we will continue to build on this document in future exercises.
Solution:
- Place your cursor to the right of the existing image in the Lilac section.
- Click on the Insert tab and from the Illustrations group, click Pictures:
- Select Lilac closeup.gif from the Word2019.2/Exercises folder and click Insert.
- Save the document.
Placing and Sizing Images
To change the size of an image in a Microsoft Word document:
- Select the image by clicking on it.
- Click on one of the circles or squares along the outside of the image and drag your mouse to make the image bigger or smaller:
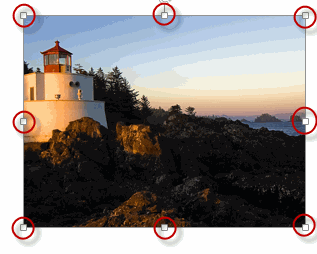
When you resize an image from the corners, the aspect ratio will not change, so the image will not become distorted.
To place an image in a specific location within a Microsoft Word document, either:
- Grab the image by clicking down on it and then drag it to its new location.
- Select the image by clicking on it and then use Cut and Paste to move it to its new location.
Place and Size an Image in a Microsoft Word Document
Duration: 5 to 10 minutes.
In this exercise, you will move and resize an image in a Microsoft Word document.
- Open or go to Plants in my yard - Intermediate.docx.
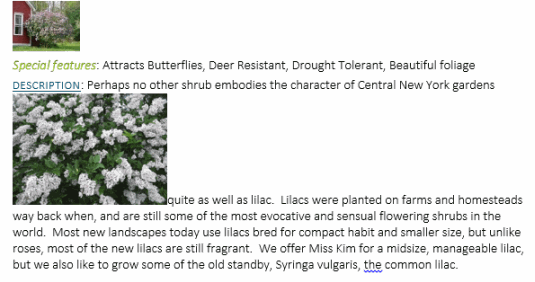
- Resize and move the image Lilac closeup.gif so that it appears as shown below:
- Save the document as we will continue to build on this document in future exercises.
Solution:
- Select the image Lilac closeup.gif by clicking on it.
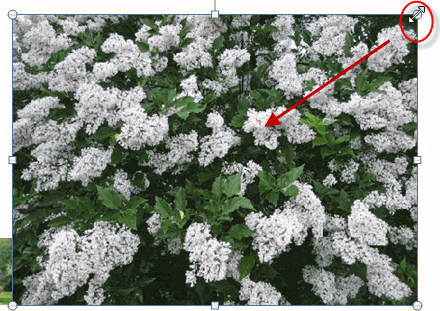
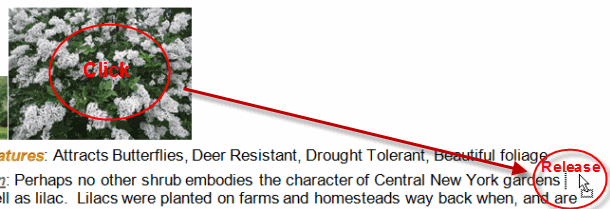
- Click on the top left corner of the image and drag to the left and down until the image is the size you want it to be:
- Grab the image by clicking down on it and then drag your cursor to the end of the first row of the description and release:
- Save the document.
Wrapping Text around an Image
There are two commands you can use to wrap text around images in Microsoft Word:
- Wrap Text. Use Wrap Text to choose the way in which text will wrap around the object.
- Position. Use Position to choose the position of the object on the page. The text will automatically wrap around the image.
The Wrap Text command
To wrap text around an image in a Microsoft Word document:
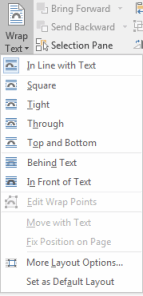
- Select the image by clicking on it and then on the Picture Tools Format tab, in the Arrange group, click Wrap Text:

- Hover over the Wrap Text options and then click on one of them to select it:
The Position command
To position text around an image in a Microsoft Word document:
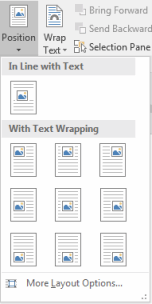
- Select the image by clicking on it and then on the Picture Tools Format tab, in the Arrange group, click Position:

- Hover over the Position options and then click on one of them to select it:
Wrapping Text around an Image
Duration: 5 to 15 minutes.
In this exercise, you will use the Wrap Text and Position commands to wrap text around an image.
- Open or go to Plants in my yard - Intermediate.docx.
- Wrap text around the image Lilac closeup.gif so that it looks like the screenshot below:
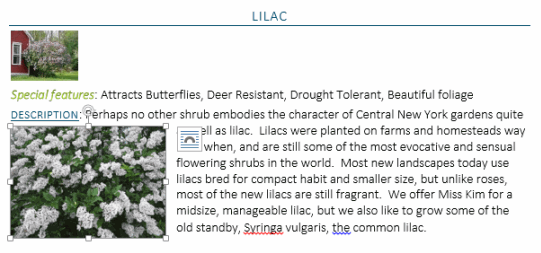
- Position the image Lilac closeup.gif so that it looks like the screenshot below:

- Save the document as we will continue to build on this document in future exercises.
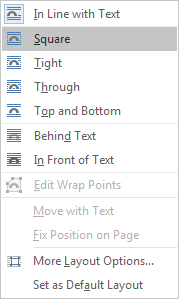
- Select the image by clicking on it and then on the Picture Tools Format tab, in the Arrange group, click Wrap Text:

- Click Square:
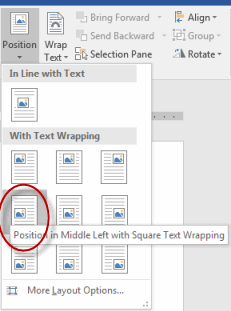
- Select the image by clicking on it and then on the Picture Tools Format tab, in the Arrange group, click Position:

- Click Position in Middle Left with Square Text Wrapping:
- Save the document.
Adjusting Images
There are a number of ways in which you can adjust pictures within Microsoft Word, including:
- Remove Background. Automatically remove the background from the picture.
- Corrections. You can sharpen and soften pictures and adjust the brightness and contrast.
- Color. You can change the color saturation, color tone and recolor pictures.
- Artistic Effects. You can apply a wide variety of artistic effects to the pictures in your documents.
To adjust pictures in Microsoft Word:
- Select the image by clicking on it.
- On the Picture Tools Format tab, in the Adjust group, click on one of the commands and then hover over the options to see what your image will look like if you select that option:

- Click an option to select it.
Adjusting Images in Microsoft Word
Duration: 15 to 25 minutes.
In this exercise, you will experiment with numerous ways of adjusting images in Microsoft Word.
- Open or go to Plants in my yard - Intermediate.docx.
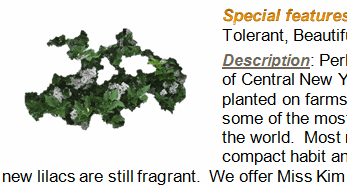
- Remove the background from the image Lilac closeup.gif so that it looks like it does in the screenshot below:
- Undo your change.
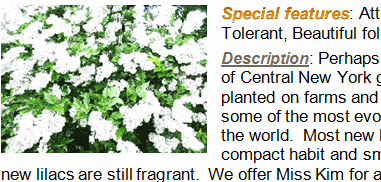
- Change the Brightness and Contrast of the image Lilac closeup.gif so that it looks like it does in the screenshot below:
- Undo your change.
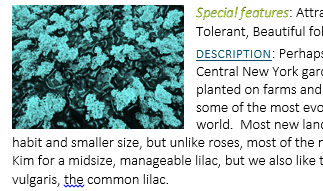
- Recolor the image Lilac closeup.gif so that it looks like it does in the screenshot below:
- Undo your change.
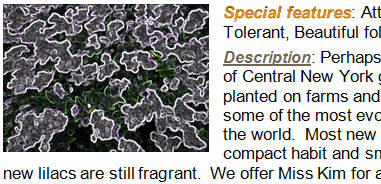
- Add an artistic effect to the image Lilac closeup.gif so that it looks like it does in the screenshot below:
- Undo your change.
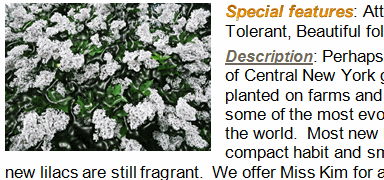
- Adjust the image Lilac closeup.gif by applying the Plastic Wrap Artistic Effect and increasing the contrast 40%. When done, your image should look like it does in the screenshot below:
- Save the document as we will continue to build on this document in future exercises.
- Select the image by clicking on it and then on the Picture Tools Format tab, in the Adjust group, click Remove Background:

- Deselect the image to see the change.
- Press Ctrl + Z to undo your change.
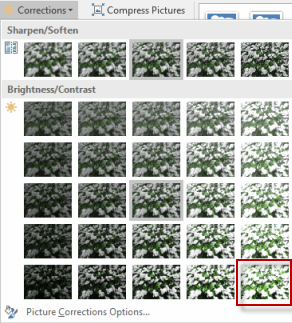
- Select the image by clicking on it and then on the Picture Tools Format tab, in the Adjust group, click Corrections:

- Leave the pre-selected Sharpen/Soften option as is and select the bottom right Brightness/Contrast option:
- Press Ctrl + Z to undo your change.
- Select the image by clicking on it and then on the Picture Tools Format tab, in the Adjust group, click Color:

- Leave the pre-selected Color Saturation and Color Tone options as they are and select one of the blue options:
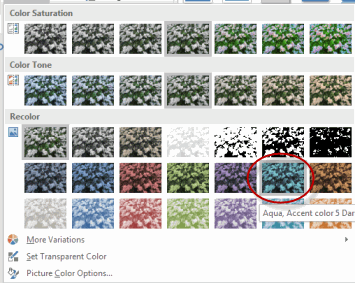
- Press Ctrl + Z to undo your change.
- Select the image by clicking on it and then on the Picture Tools Format tab, in the Adjust group, click Artistic Effects:

- Select the Glow Edges option in the bottom right:
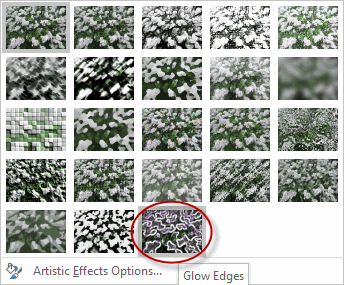
- Press Ctrl + Z to undo your change.
- Select the image by clicking on it and then on the Picture Tools Format tab, in the Adjust group, click Artistic Effects:

- Select the Plastic Wrap option in the fourth row on the right:
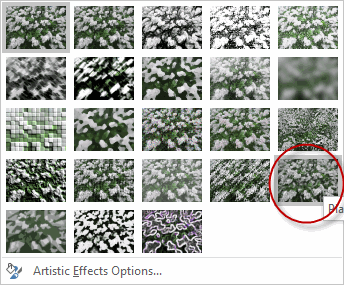
- Select the image by clicking on it and then on the Picture Tools Format tab, in the Adjust group, click Corrections:

- Leave the pre-selected Sharpen/Soften option as is and select the middle right Brightness/Contrast option:
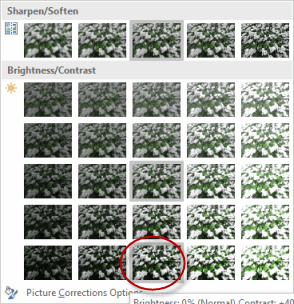
- Save the document.
Borders and Effects
In addition to the ways already covered in this course, you can customize your pictures in Microsoft Word by adding picture borders and picture effects.
Picture Borders
To add picture borders to a picture in a Microsoft Word document:
- Select the image by clicking on it.
- On the Picture Tools Format tab, in the Picture Styles group, click Picture Border:

- Select a color by clicking on it:
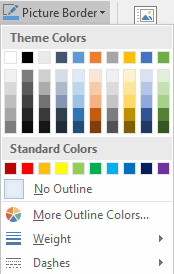
- Click Picture Border again and hover over Weight or Dashes to set the width and line style of the border.
Picture Effects
To add picture effects to a picture in a Microsoft Word document:
- Select the image by clicking on it.
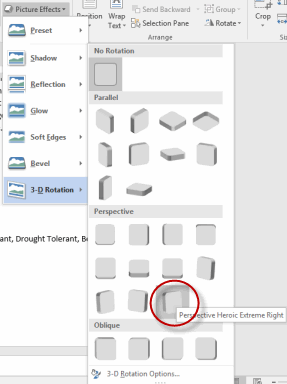
- On the Picture Tools Format tab, in the Picture Styles group, click Picture Effects:

- Hover over the options to see the many Picture Effects you can apply to your picture:
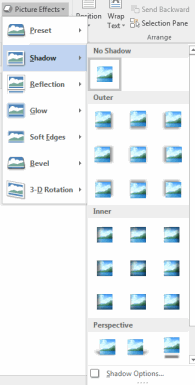
- Select a picture effect by clicking on it.
Adding Borders and Effects to Images in Microsoft Word
Duration: 5 to 10 minutes.
In this exercise, you will add borders and effects to a picture in a Microsoft Word document.
A PDF containing these exercise instructions is in your Exercises folder (Adding Borders and Effects to Images.pdf). If your manual is not in color, please open that file to see the screenshots in color.
- Open or go to Plants in my yard - Intermediate.docx.
- Add borders and effects to the image of a Red Bud tree so that it looks like the below:

- Save the document as we will continue to build on this document in future exercises.
Solution:
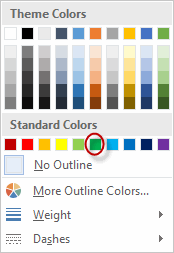
- Select the image by clicking on it and then on the Picture Tools Format tab, in the Picture Styles group, click Picture Border:

- Select one of the green colors:
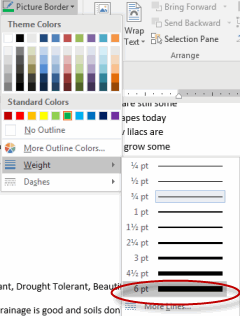
- Click Picture Border again, scroll over Weight, and select 6 pt:
- Click Picture Effects, scroll over 3-D Rotation, and select Perspective Heroic Extreme Right:
- Save the document.
Comments
Post a Comment