The Quick Access Toolbar in MS Excel
Lesson Goals
- Learn to add common commands to the Quick Access Toolbar.
- Learn to add additional commands to the Quick Access Toolbar.
- Learn to move the Quick Access Toolbar.
The Quick Access Toolbar
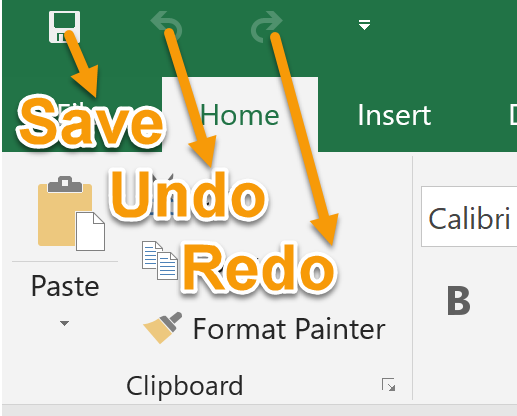
The Quick Access Toolbar is a small toolbar that includes commonly used commands and is always accessible. By default, the Quick Access Toolbar is located in the top-left corner of Microsoft Excel. By default, the Quick Access Toolbar includes three commands: Save, Undo, and Redo:
- Save. Click Save to save your workbook.
- Undo. Click Undo to undo the action you last performed.
- Click the drop-down arrow to the right of Undo to undo multiple actions at the same time.
- Redo. Click Redo to repeat the action you last performed.
Adding Common Commands
To add commonly used commands to the Quick Access Toolbar:
- Click the drop-down arrow to the right of the Quick Access Toolbar.

- Select a command from the list that appears.

Adding Additional Commands with the Customize Dialog Box
To add additional commands to the Quick Access Toolbar:
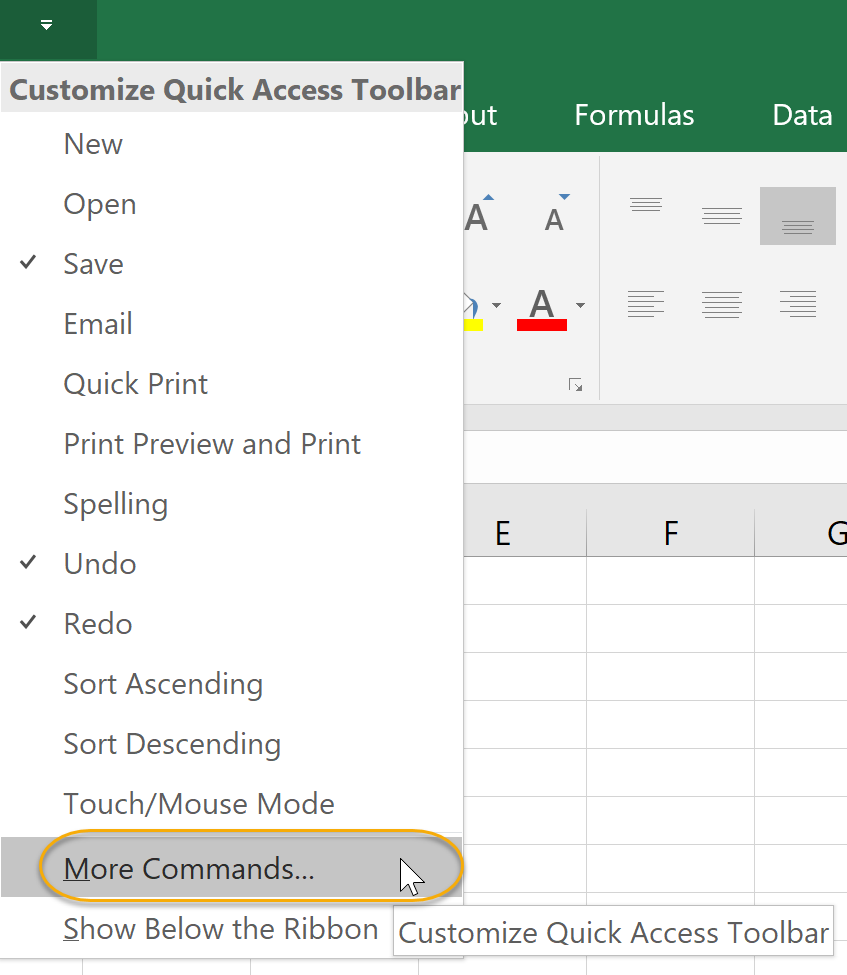
- Click the drop-down arrow on the far right of the Quick Access Toolbar.
- Select More Commands... towards the bottom of the list that appears:
- Select a command from the list circled below and click Add > >.
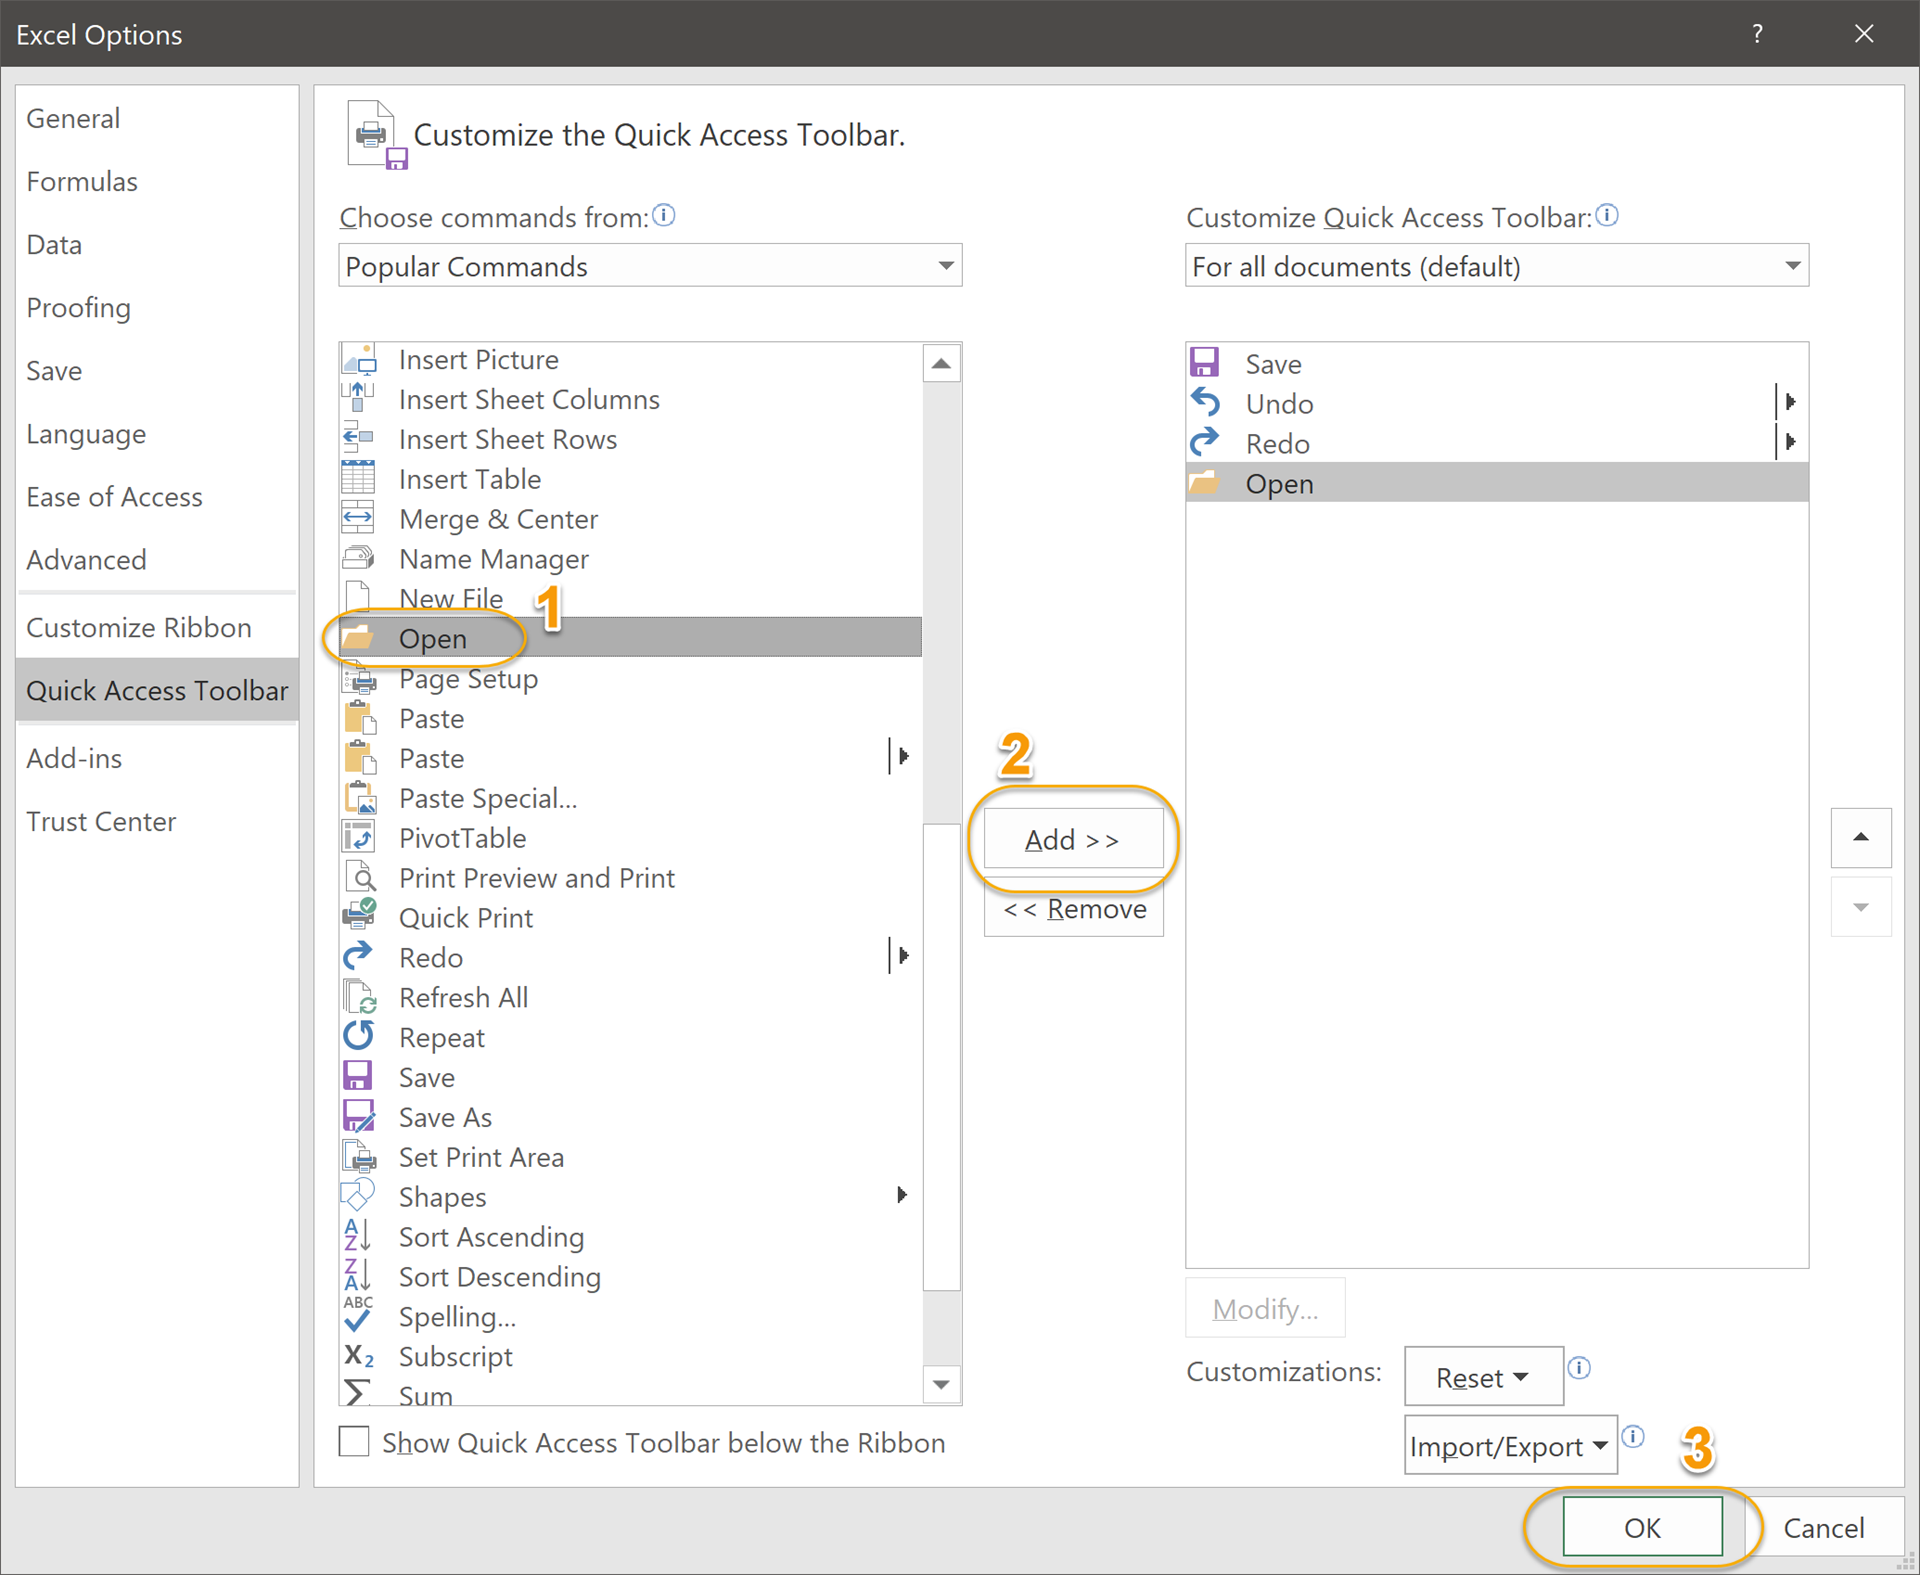
- Click OK to make your changes.
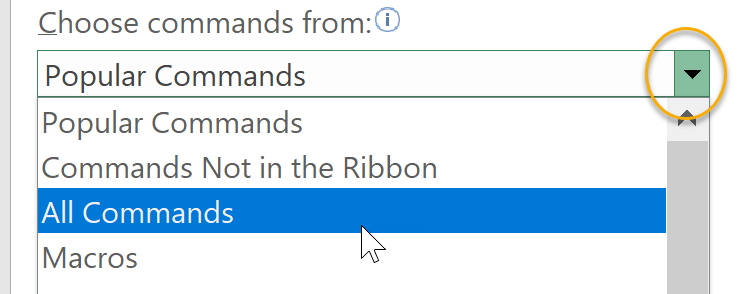
- Note that clicking More Commands shows Popular Commands by default. There are many additional commands available, you can get to by changing Popular Commands to All Commands, as shown below:
New in Excel 2019, you can add Subscript and Superscript to the Quick Access Toolbar, as well as the Ribbon.
Adding Ribbon Commands or Groups
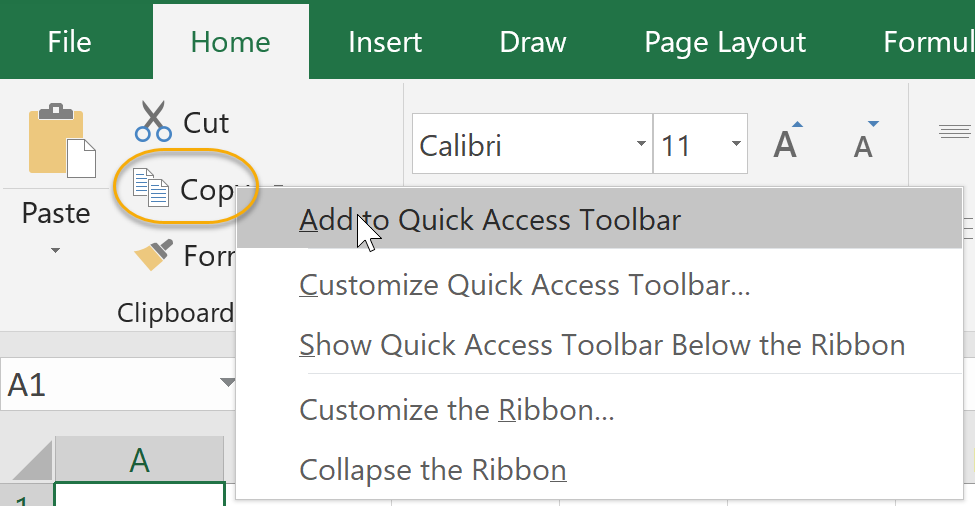
If you find yourself using the same commands or group of commands frequently, you can quickly add them to the Quick Access Toolbar:
- Right-click on the command or on the group name.
- Select Add to Quick Access Toolbar:
Placement
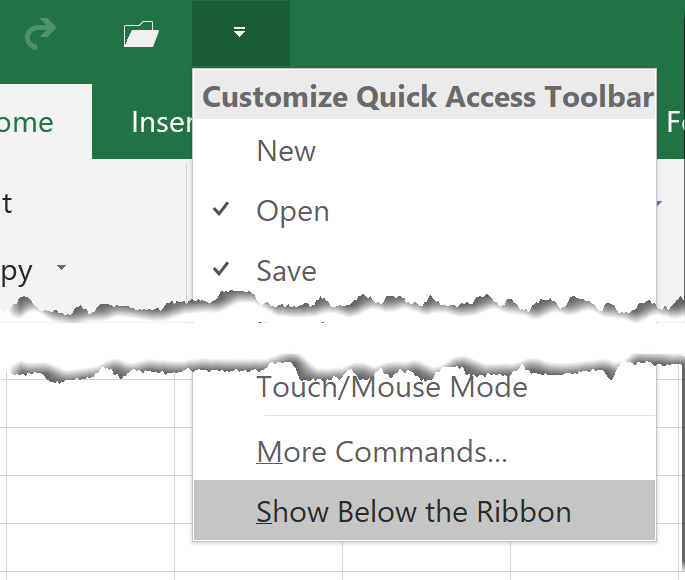
You can choose to keep the Quick Access Toolbar in the upper-left corner of Excel. To move the Quick Access Toolbar below the Ribbon or move it to the top left corner of Microsoft Excel:
- Click the drop-down arrow on the far right of the Quick Access Toolbar.
- Select Show Below the Ribbon.
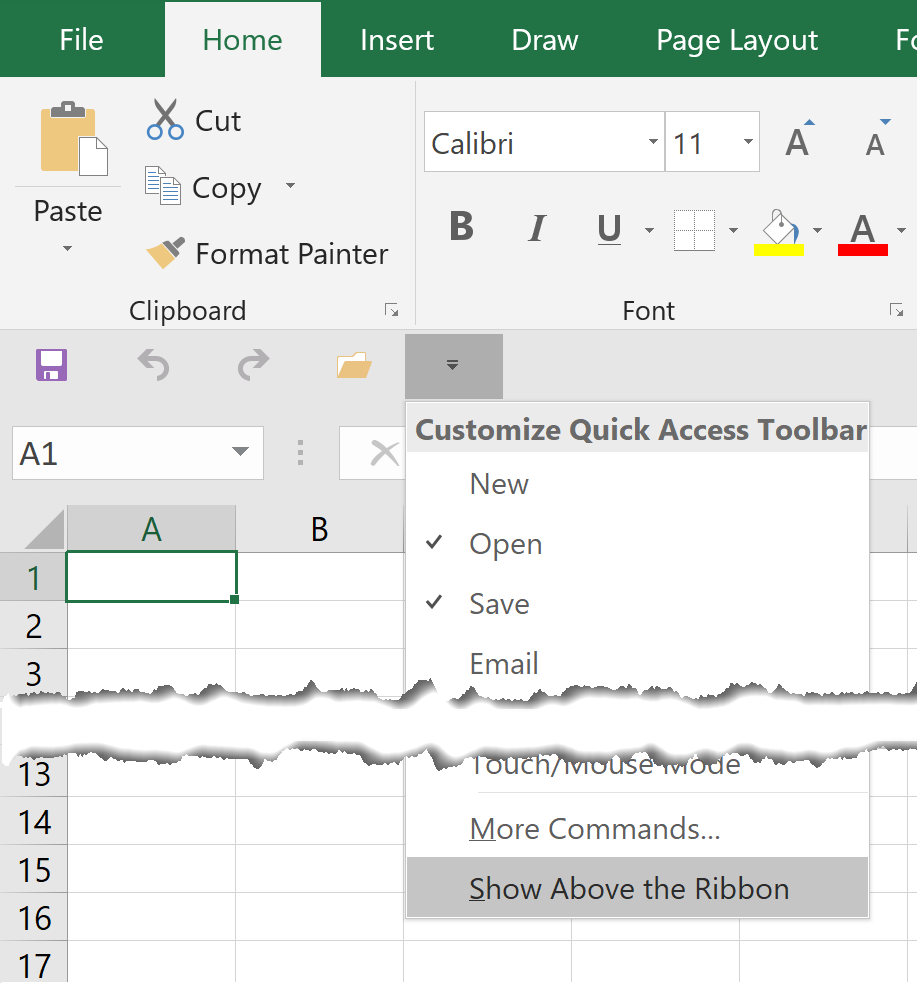
- To move it back, click the drop-down arrow again and select Show Above the Ribbon.
Customize the Quick Access Toolbar
Duration: 10 to 20 minutes.
In this exercise, you will customize the Quick Access Toolbar.
- Add the following commands to the Quick Access Toolbar:
- New
- Open
- Quick Print
- Paste
- Find
- Remove Find from the Quick Access Toolbar.
- Move the Quick Access Toolbar below the Ribbon.
Solution:
- To add commands to the Quick Access Toolbar:
- New: click the drop-down arrow to the right of the Quick Access Toolbar and check New.
- Open: click the drop-down arrow to the right of the Quick Access Toolbar and check Open.
- Quick Print: click the drop-down arrow to the right of the Quick Access Toolbar and check Quick Print.
- Paste: click the drop-down arrow to the right of the Quick Access Toolbar and select More Commands.... Highlight Paste in the left column and click Add > >.
- Find: click the drop-down arrow to the right of the Quick Access Toolbar and select More Commands. Then click the drop-down arrow to the right of Popular Commands and change it to All Commands. Highlight Find in the left column and click Add > >.
- To remove Find from the Quick Access Toolbar:
- Click the drop-down arrow to the right of the Quick Access Toolbar and select More Commands.... Highlight Find in the right column and click < < Remove.
- To move the Quick Access Toolbar below the Ribbon:
- Click the drop-down arrow to the right of the Quick Access Toolbar and select Show Below the Ribbon.
- Optional: to move the Quick Access Toolbar back to the upper-left corner, click the drop-down arrow to the right of the Quick Access Toolbar and select Show Above the Ribbon.


Comments
Post a Comment